
No need to knead this bread. Sorry, I can't help it! Crusty, golden, rustic and ridiculously easy to make, this no-knead bread recipe uses just four ingredients to make a loaf with a crisp crust and a soft, chewy centre. The best part? You barely have to do anything.
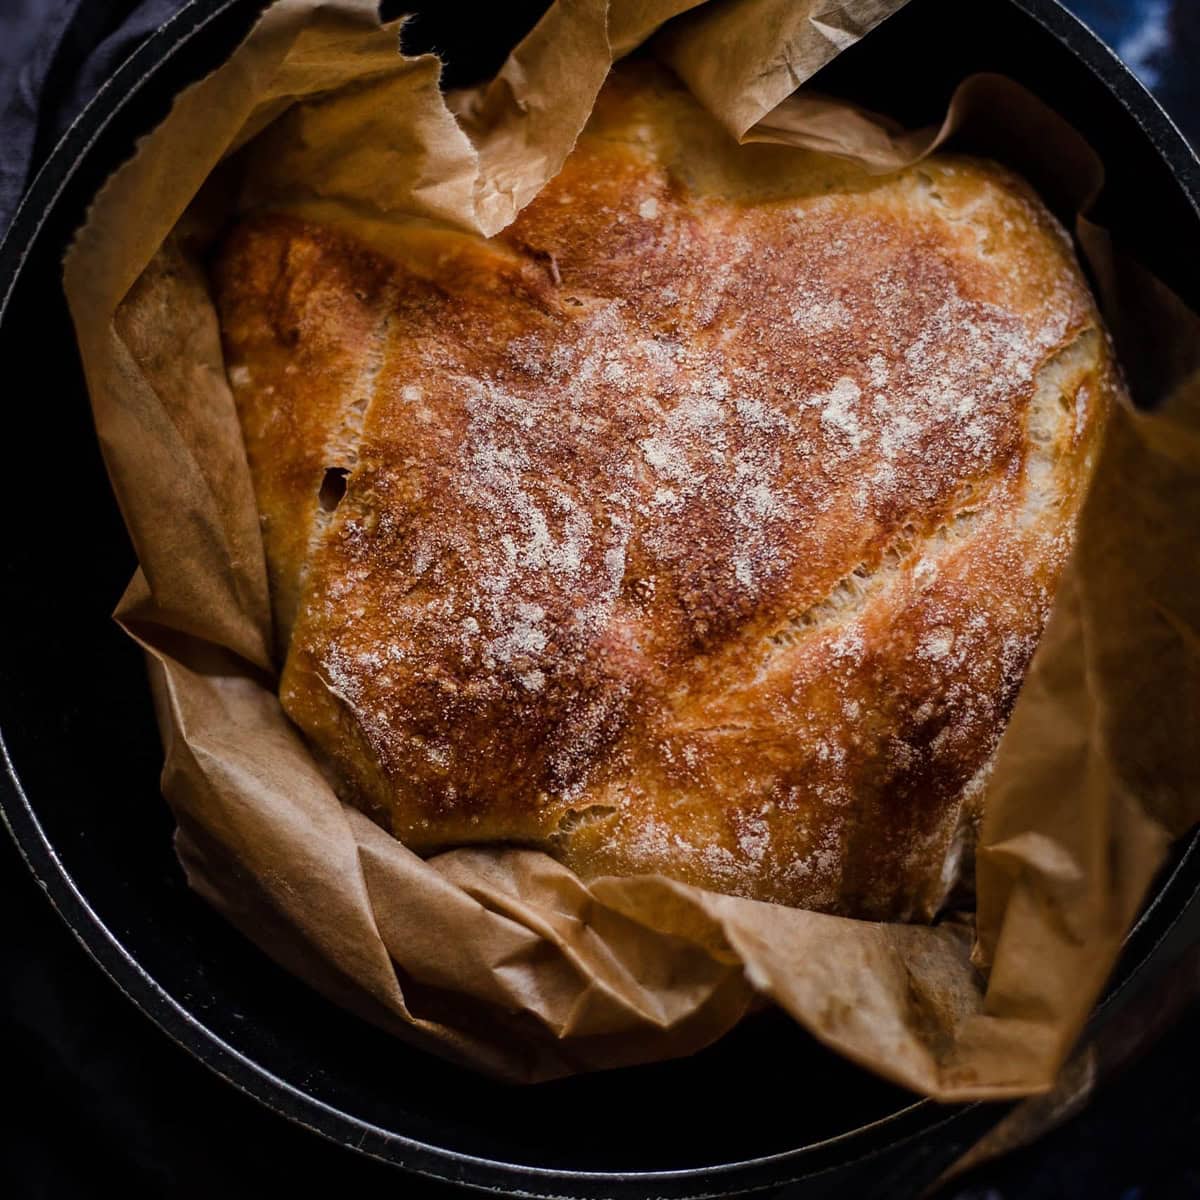
Mix the ingredients together, leave the dough to rise overnight, shape it gently, then let it rise again before baking. A hot, covered pot does the rest, giving you that beautiful crust usually associated with artisan bread.
Read more: Easy No-Knead Bread (4 Ingredients)A few months ago, I received messages from readers who wanted to make bread but found the whole process daunting. I'd shared a picture of some garlic bread rolls on my Instagram Stories, which prompted a conversation about how intimidating bread-making can seem when you've never tried it before.
I messaged back to say that it was actually really easy, despite what Paul Hollywood would have you believe!
Baking was one of the first things I did to help relieve anxiety. Even more than baking cakes, though, I LOVE making bread. This recipe is a personal favourite because it feels like magic. So little effort, such a great reward.
If you've been putting off making bread because you don't fancy kneading dough on your kitchen counter, this is a good place to start.
Jump to:
- No-Knead Bread Recipe Snapshot
- Why You'll Love This No-Knead Bread
- A Little About No-Knead Bread
- What Is No-Knead Bread?
- Ingredients You'll Need
- Equipment You'll Need
- How to Make No-Knead Bread
- Tips for Making the Best No-Knead Bread
- Recipe Testing Notes
- Variations
- What to Serve with No-Knead Bread
- How to Store No-Knead Bread
- Frequently Asked Questions
- 📖 Recipe
No-Knead Bread Recipe Snapshot
- Taste: Mild, wheaty and slightly yeasty, with flavour developed during the long fermentation.
- Texture: A crisp, golden crust with a soft, chewy interior and an open crumb.
- Effort: Minimal hands-on preparation, with time doing most of the work.
- Prep time: 10 minutes.
- First rise: 12-18 hours.
- Second rise: Approximately 2 hours.
- Cook time: 45-60 minutes.
- Total time: Approximately 15-21 hours, plus cooling.
- Yield: 1 large loaf, approximately 8-10 slices.
- Difficulty: Easy.
- Best served with: Soup, dips, butter, olive oil or your favourite sandwich fillings.
- Dietary information: Vegetarian, vegan and dairy-free when made with the ingredients listed. Contains gluten.
Times are approximate. Fermentation and baking can take longer depending on your kitchen temperature and oven.
Why You'll Love This No-Knead Bread
- Just four ingredients. Flour, yeast, salt and water are all you need.
- No kneading. Mix the dough with a spoon, then let time develop its structure.
- A proper crusty loaf. Baking in a preheated, covered pot helps create that crisp exterior.
- An airy, chewy middle. The wet dough and long fermentation encourage those lovely irregular holes.
- Easy to plan ahead. Mix the dough in the evening, shape it the following day and bake when you're ready.
- A useful recipe to have in your repertoire. Serve it alongside dinner, make toast the next morning or freeze slices for later.
A Little About No-Knead Bread
This is a popular bread-making method made famous in its modern form by New York baker Jim Lahey. His approach was widely popularised in the mid-2000s, although long fermentation and minimal handling have much older roots in bread-making.
I've previously shared this recipe, along with a cheat's sourdough, but removed both from the site because I wanted to update them. I wanted to bring this loaf back because it is such a useful recipe to have in your kitchen.
What I love about this method is that it takes away much of the work people associate with bread-making. Instead of kneading the dough until it becomes smooth and elastic, you allow time to develop its structure and flavour.
The dough transforms while it rests, becoming bubbly and aerated. You then shape it gently, give it another rise and bake it in a hot pot.
Once you see it happen, you'll understand why I think this bread feels a little like magic.
What Is No-Knead Bread?
No-knead bread is bread made without the usual process of kneading the dough by hand or with a mixer.
Instead, you combine the ingredients and leave the dough to ferment for an extended period. The yeast produces carbon dioxide, creating bubbles throughout the dough, while the flour absorbs the water and gradually develops structure.
After the first rise, the dough is shaped gently and left to rise again before baking.
A heavy pot with a lid is particularly useful because it traps steam around the dough during the first part of baking. This allows the loaf to expand before the crust sets. Removing the lid towards the end allows the crust to turn a deep golden brown.
You don't need a professional bread oven or specialist bread-making skills. A suitable oven-safe pot with a lid is enough.
Ingredients You'll Need
This recipe uses four everyday ingredients. Each one has an important job to do.
1. Flour
You can use either plain flour or strong white bread flour.
I prefer bread flour because its higher protein content helps develop the gluten structure needed for a chewy crumb. Plain flour works too, although the texture may be a little different.
Measure your flour carefully using the same cup-measuring method each time. Scooping flour directly from the bag can pack more into a cup and change the consistency of the dough.
2. Instant Dried Yeast
A small amount of instant dried yeast is all you need for this recipe. Because the dough ferments for many hours, there's no need to use the larger quantity you might find in a quick-rise bread recipe.
Check the use-by date on your yeast and store it according to the packet instructions.
If you're using a different type of yeast, check the manufacturer's conversion guidance before substituting.
3. Salt
Salt gives the bread flavour and helps regulate fermentation.
I use 1¼ teaspoons, which seasons the loaf without overpowering the natural flavour of the flour. Measure it accurately for a consistent result.
4. Lukewarm Water
Water hydrates the flour and helps the dough develop its structure. It also supports yeast activity during fermentation.
Use lukewarm water rather than hot water. It should feel comfortably warm, not hot to the touch.
The dough will be wetter and stickier than a traditional kneaded bread dough. Don't worry if it looks unfamiliar; that consistency is part of what makes this method work.
Equipment You'll Need
- A large mixing bowl.
- A wooden spoon or sturdy spatula.
- A bowl scraper or rubber spatula for transferring the dough.
- Cling film, a plate or a clean tea towel to cover the bowl.
- A clean, smooth cotton tea towel for the second rise, if using.
- A heavy oven-safe pot with a lid, such as a cast-iron Dutch oven.
- Baking paper, if you prefer to use it when transferring the dough.
- A wire cooling rack.
Tip - A Dutch oven/Cast Iron pot with a capacity of approximately 6-8 quarts (roughly 5.7-7.6 litres) is suitable for a large loaf. Check that the pot, lid and handles can withstand the high baking temperature.
How to Make No-Knead Bread
Step 1: Mix the Dough
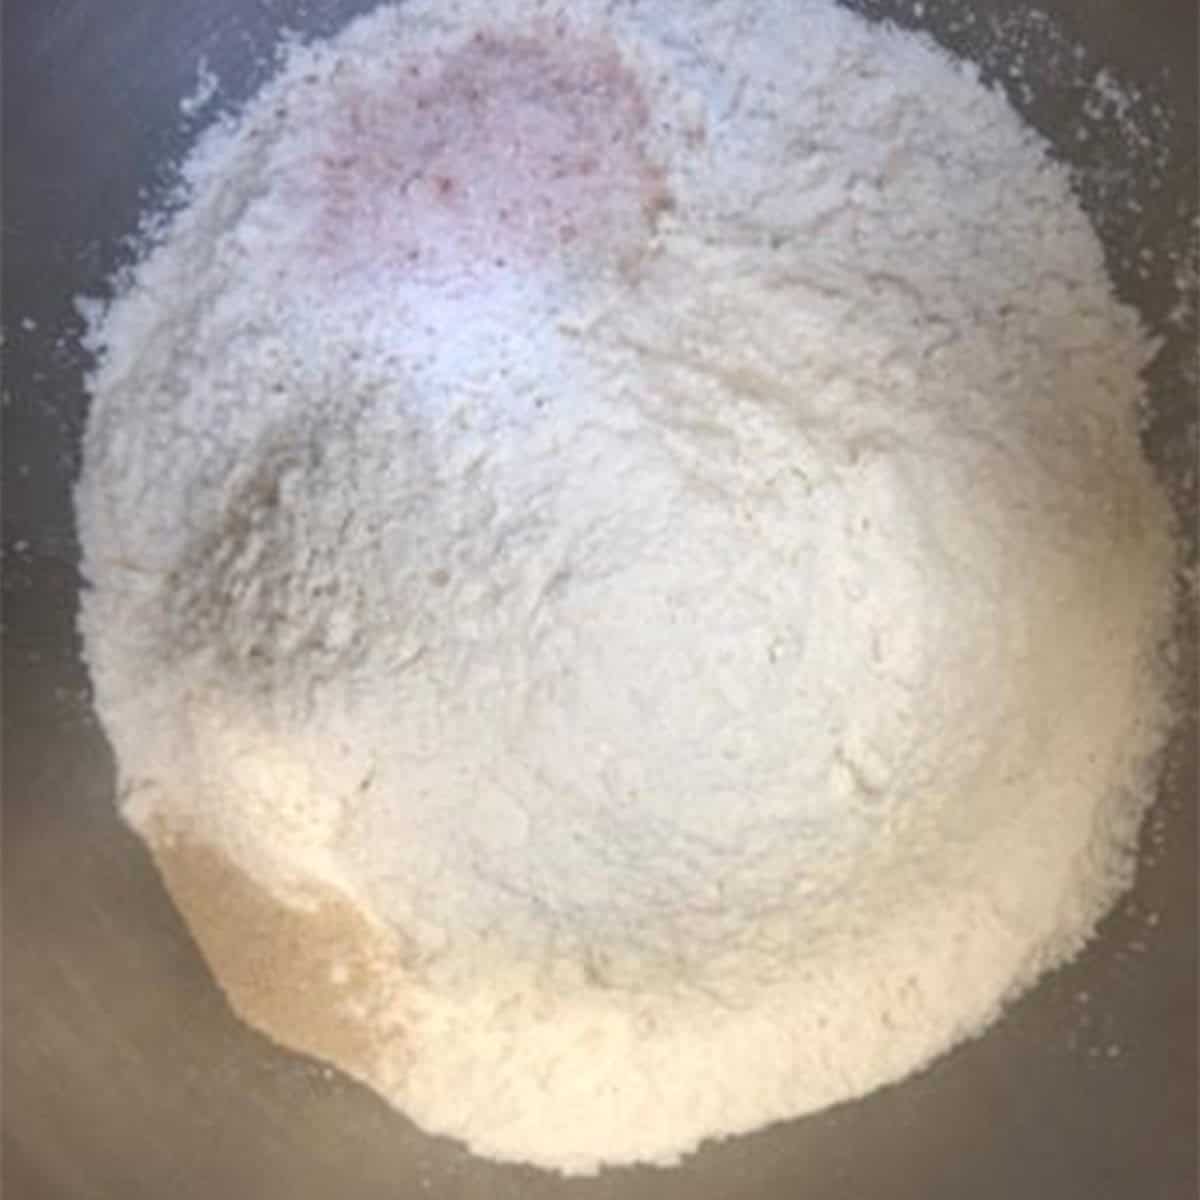
Add the flour, instant yeast and salt to a large mixing bowl. Stir to combine.
Pour in the lukewarm water and mix with a wooden spoon or your hand until all the flour has been incorporated. This should only take around 30 seconds.
The dough will look rough, shaggy and sticky rather than smooth. It may cling to the spoon or your fingers, and that's completely normal.
Don't add extra flour just because the dough feels sticky. A wetter dough helps produce the open crumb that makes this bread so lovely.
Step 2: Leave the Dough to Rise Overnight
Cover the bowl with a plate, cling film or a clean tea towel.
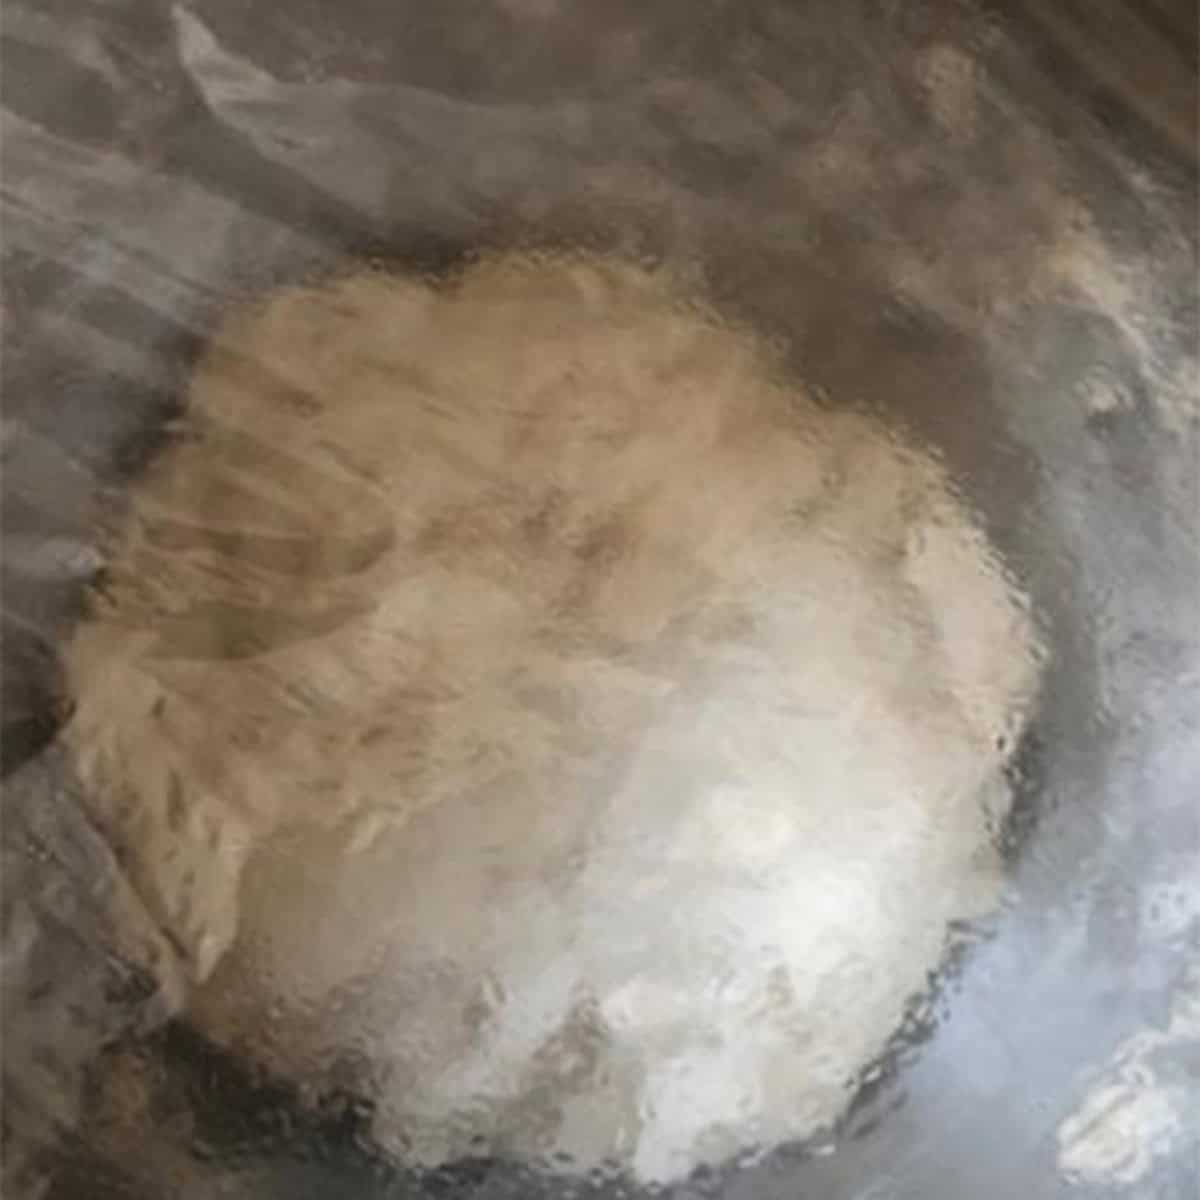
Leave the dough at room temperature, away from direct sunlight, for at least 12 hours and preferably around 18 hours.
A room temperature of approximately 22°C is a useful guide. If your kitchen is cooler, fermentation will happen more slowly and the dough may need longer.
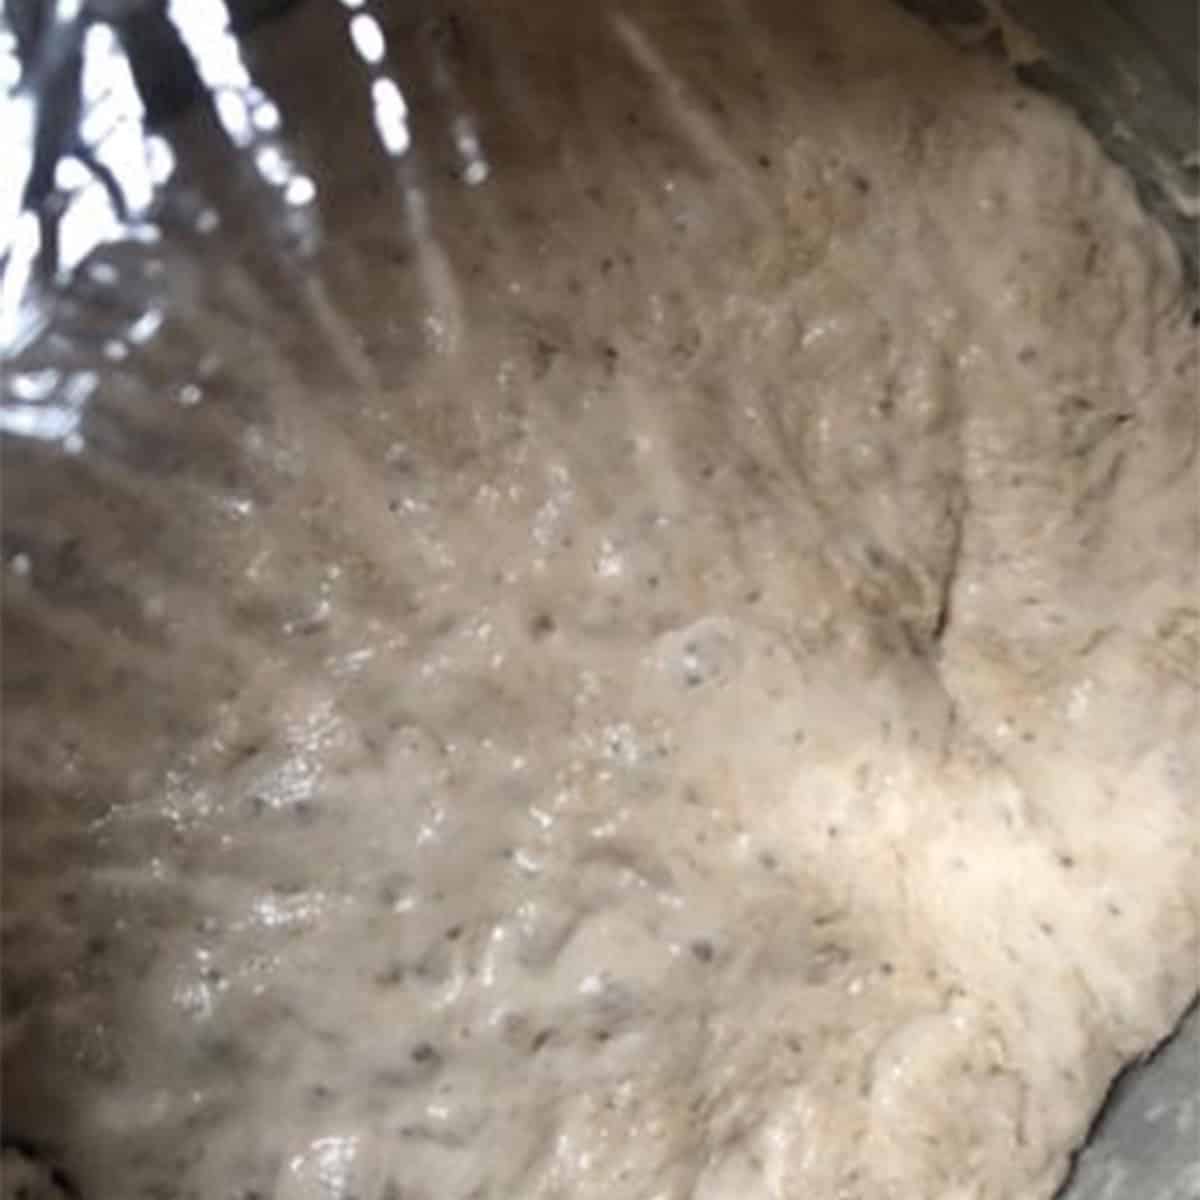
The dough is ready when its surface is dotted with bubbles and it looks visibly aerated. You may also notice that it has expanded considerably and has a slightly fermented aroma.
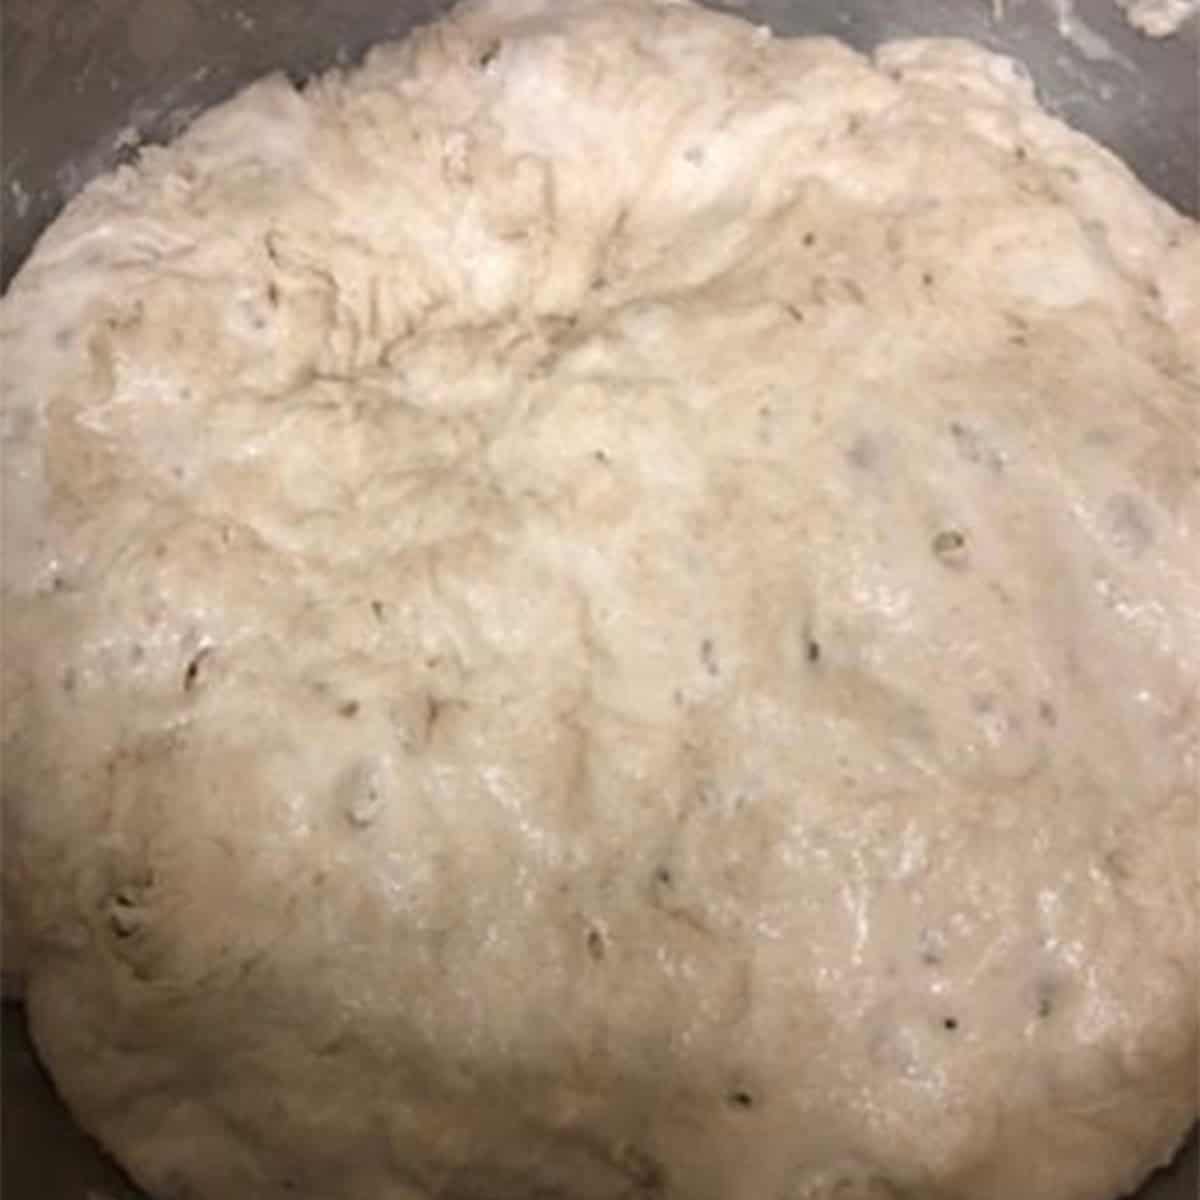
This long, slow rise develops the flavour and structure of the bread. Resist the temptation to rush it.
Step 3: Shape the Dough
Generously flour your work surface. Use a bowl scraper or rubber spatula to ease the dough out of the bowl in one piece.
It will be loose, sticky and may stretch into long strands as you lift it. This is what you want, so avoid adding more flour to make it feel like a conventional bread dough.
Lightly flour your hands and gently lift the edges of the dough towards the centre, folding them over one another. Continue around the dough until you have formed a rough, round shape.
Tuck the edges underneath to make a loose ball.
Work quickly and gently. You don't need to knead the dough or make it perfectly smooth.
Step 4: Prepare for the Second Rise
Generously dust a clean, smooth cotton tea towel with flour, cornmeal or wheat bran. Avoid using a fluffy terry-cloth towel, as the dough can stick to it.
Place the dough on the towel with the seam facing down. Dust the top lightly with more flour, cornmeal or bran, then cover with another clean tea towel or cling film.
Leave it to rise for approximately 2 hours.
During this time, the dough should expand and become noticeably puffier.
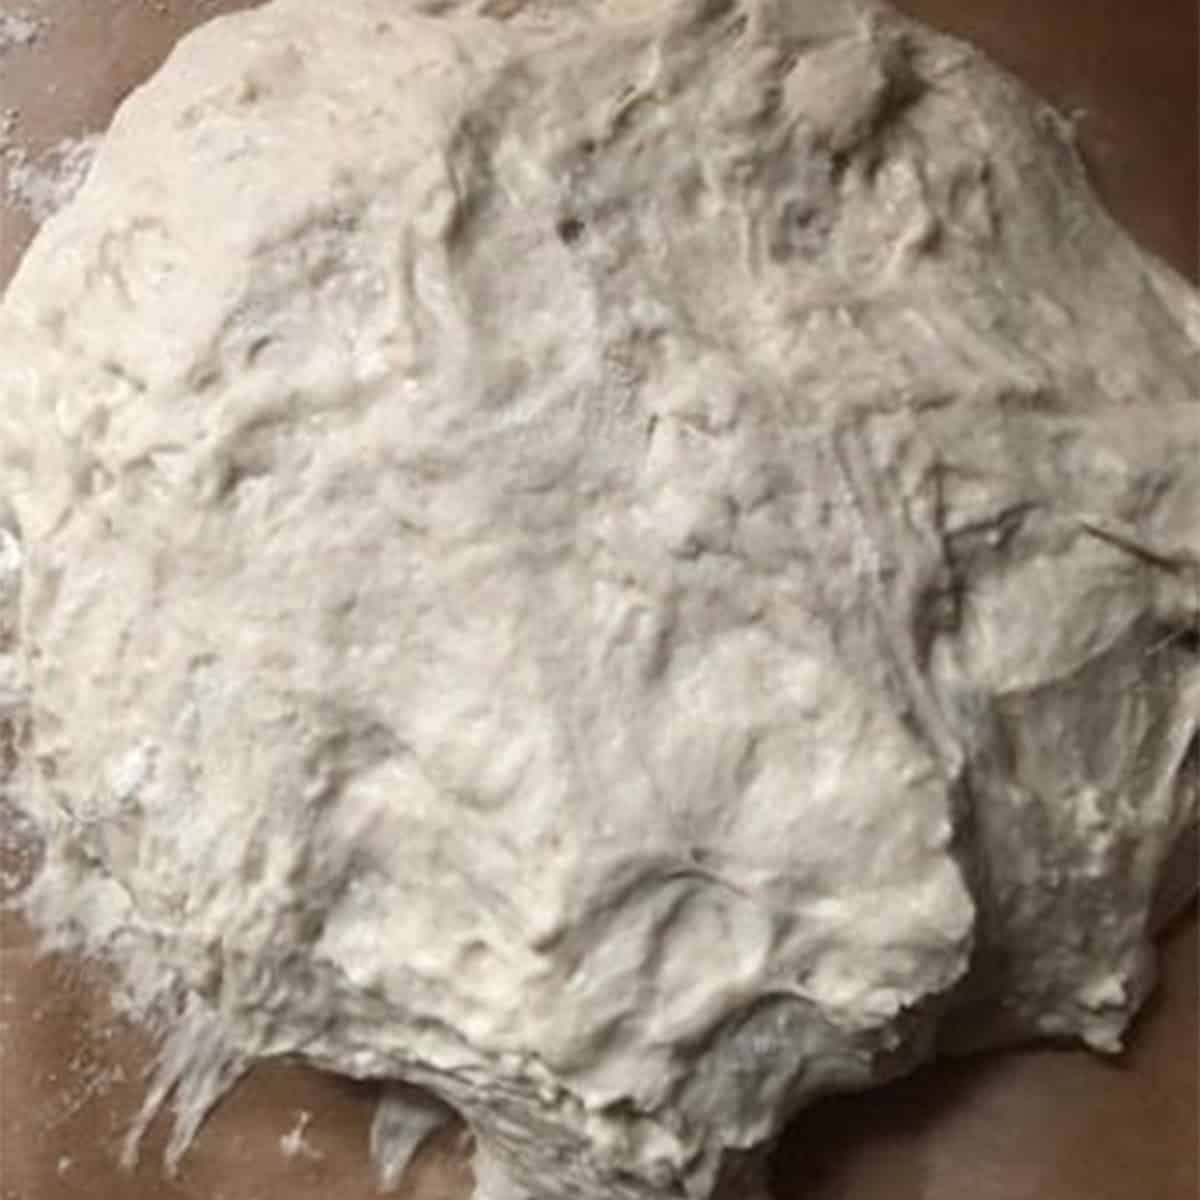
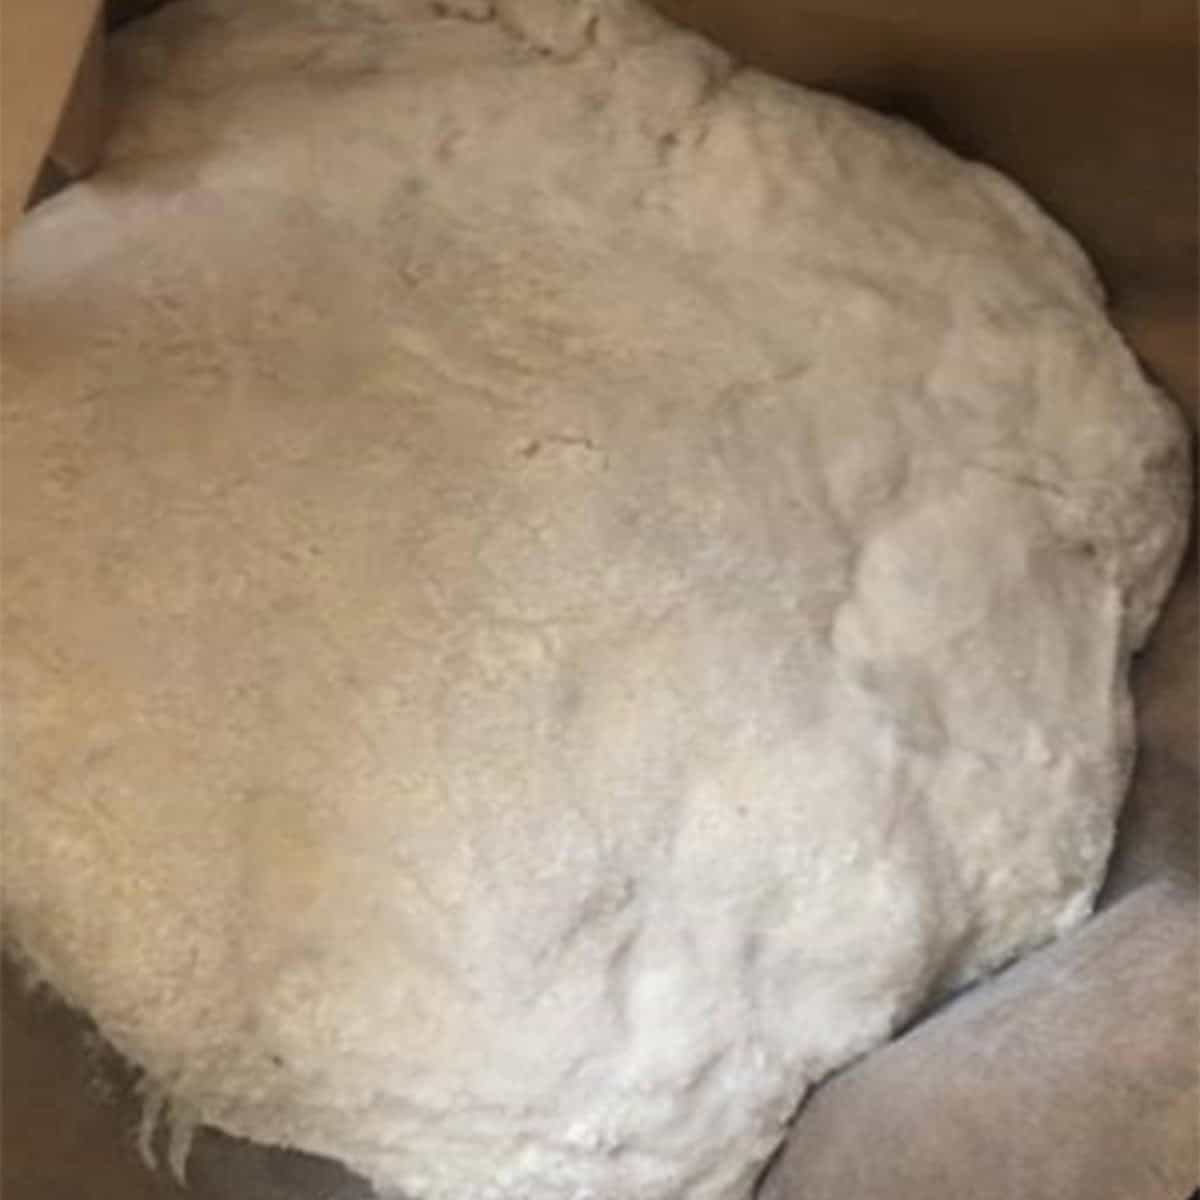
How do you know when it's ready? Gently press the dough with a floured fingertip. If the indentation remains and the dough feels airy, it's likely ready to bake. If it springs back immediately, give it another 15 minutes and check again.
Step 5: Preheat the Oven and Pot
About 30 minutes before the second rise is complete, preheat your oven to 230°C conventional / 210°C fan / Gas Mark 8.
Place the oven rack in the lower third of the oven. Put your empty Dutch oven and its lid inside to heat thoroughly.
The hot pot helps the dough begin baking immediately and creates the steamy environment needed for a crisp crust.
Take care when handling the pot. It will be extremely hot, so use thick oven gloves and keep it on a stable, heatproof surface.
Step 6: Transfer the Dough to the Hot Pot
Once the dough has completed its second rise, carefully remove the hot pot from the oven and take off the lid.
Uncover the dough and gently lift it into the pot, turning it over so the seam faces upwards.
Take care not to touch the hot sides of the pot. The dough may look a little untidy when it lands, but don't worry about that. It will expand as it bakes.
If you prefer, you can use a piece of baking paper to help transfer the dough, provided the paper is suitable for the oven temperature. Avoid leaving excess paper close to heating elements.
Step 7: Bake with the Lid On
Cover the pot and return it to the oven.
Bake for 30 minutes with the lid on. The covered pot traps steam released by the dough, allowing the loaf to expand before the crust sets.
Step 8: Remove the Lid and Finish Baking
Carefully remove the lid, keeping your hands and face away from escaping steam.
Continue baking uncovered for another 15-30 minutes, until the bread has developed a deep golden-brown crust.
The exact time will depend on your oven and how dark you like your crust. Keep an eye on the loaf towards the end of baking.
Step 9: Cool Before Slicing
Use oven gloves or a suitable heatproof spatula to remove the bread from the pot. Transfer it to a wire rack.
Leave the loaf to cool for at least an hour before slicing.
I know it's tempting to cut into freshly baked bread straight away, but the inside continues to set as it cools. Slicing too early can leave the crumb gummy, even when the loaf is fully baked.
Once cooled, slice and serve.
Tips for Making the Best No-Knead Bread
Don't Rush the First Rise
The long fermentation is central to this recipe. It develops the flavour and gives the dough time to become airy.
Look for bubbles across the surface rather than relying on the clock alone.
Remember That Sticky Dough Is Normal
This isn't a dough you need to knead until smooth. It should be loose and sticky after mixing and may cling to the bowl when you turn it out.
Use a scraper and lightly floured hands rather than adding lots of extra flour.
Be Gentle When Shaping
You only need to fold the edges towards the centre and tuck them underneath. Overworking the dough isn't necessary and can knock out some of the air that has developed during fermentation.
Give the Dough Its Second Rise
The second rise allows the shaped dough to become puffy before baking. If the dough springs back immediately when lightly pressed, leave it for another 15 minutes and check again.
Preheat the Pot Properly
A thoroughly heated pot helps the loaf expand when it first goes into the oven. The lid traps steam, which helps create a crisp crust.
Check Your Yeast
Yeast that is old or poorly stored may not work effectively. If the dough hasn't developed bubbles after a reasonable amount of time, check the yeast and consider whether your kitchen is particularly cold.
Know When the Bread Is Done
The crust should be a deep golden brown and feel firm. You can also tap the base of the loaf; it should sound hollow, although this isn't a foolproof test.
For a more reliable check, the centre of a fully baked lean loaf will generally reach around 95-99°C.
Let the Bread Cool Completely
Allow at least an hour for cooling before slicing. This gives the crumb time to set, making the bread easier to cut and improving its texture.
Recipe Testing Notes
- The dough is wetter than usual bread dough. This is intentional and helps create an open crumb. Resist adding more flour during mixing.
- The first rise depends on temperature. A cool kitchen slows fermentation, while a warmer kitchen speeds it up. Look for bubbles and an aerated appearance.
- The second rise matters. After shaping, give the dough approximately 2 hours to become puffy, checking its readiness rather than relying entirely on the clock.
- The covered pot creates steam. This is an important part of the original method and helps the crust develop.
- Baking time varies. Allow 15-30 minutes uncovered, depending on your oven and preferred crust colour.
- The crumb needs time to set. Cool the loaf on a wire rack before slicing.
Variations
Wholemeal No-Knead Bread
You can experiment with wholemeal flour, but the loaf will usually be denser than one made with white bread flour.
Wholemeal flour absorbs water differently, so the dough may need more moisture. For a more predictable result, start by replacing part of the white flour with wholemeal flour rather than substituting all of it at once.
No-Knead Bread with Plain Flour
Plain flour works in this recipe if you don't have strong white bread flour. The finished loaf may have a slightly less chewy texture, but it is still a useful option.
Seeded No-Knead Bread
Try adding a small handful of sunflower, pumpkin or sesame seeds to the dough. Seeds absorb moisture, so large quantities may change the consistency.
You can also scatter seeds over the surface before baking, although they may not adhere well without a little water.
Herb and Garlic Bread
Add dried herbs to the flour before mixing for a savoury variation. Alternatively, serve the finished loaf with garlic butter or alongside a garlicky soup.
Fresh garlic and other wet additions can affect moisture and fermentation, so keep the first experiment simple.
Can You Make No-Knead Bread in a Loaf Tin?
Yes, you can try baking no-knead bread in a loaf tin, although the shape and crust will be different from a round loaf baked in a Dutch oven.
The dough is quite wet, so it may not hold the neat shape you'd expect from a traditional sandwich loaf. A loaf tin helps contain the dough, but the finished bread will depend on the size of the tin and the consistency of the dough.
To try it, grease your loaf tin and line it with baking paper. After the dough has completed its first rise, gently shape it and transfer it to the tin. Allow it to rise until it looks puffy before baking.
An ordinary loaf tin won't trap steam in the same way as a covered cast-iron pot, so the crust may be less crisp. The bread may still be delicious for sandwiches and toast, but the crumb and crust can differ from the original recipe.
Note - The one below was made in a loaf tin with a seeded Bread Flour.
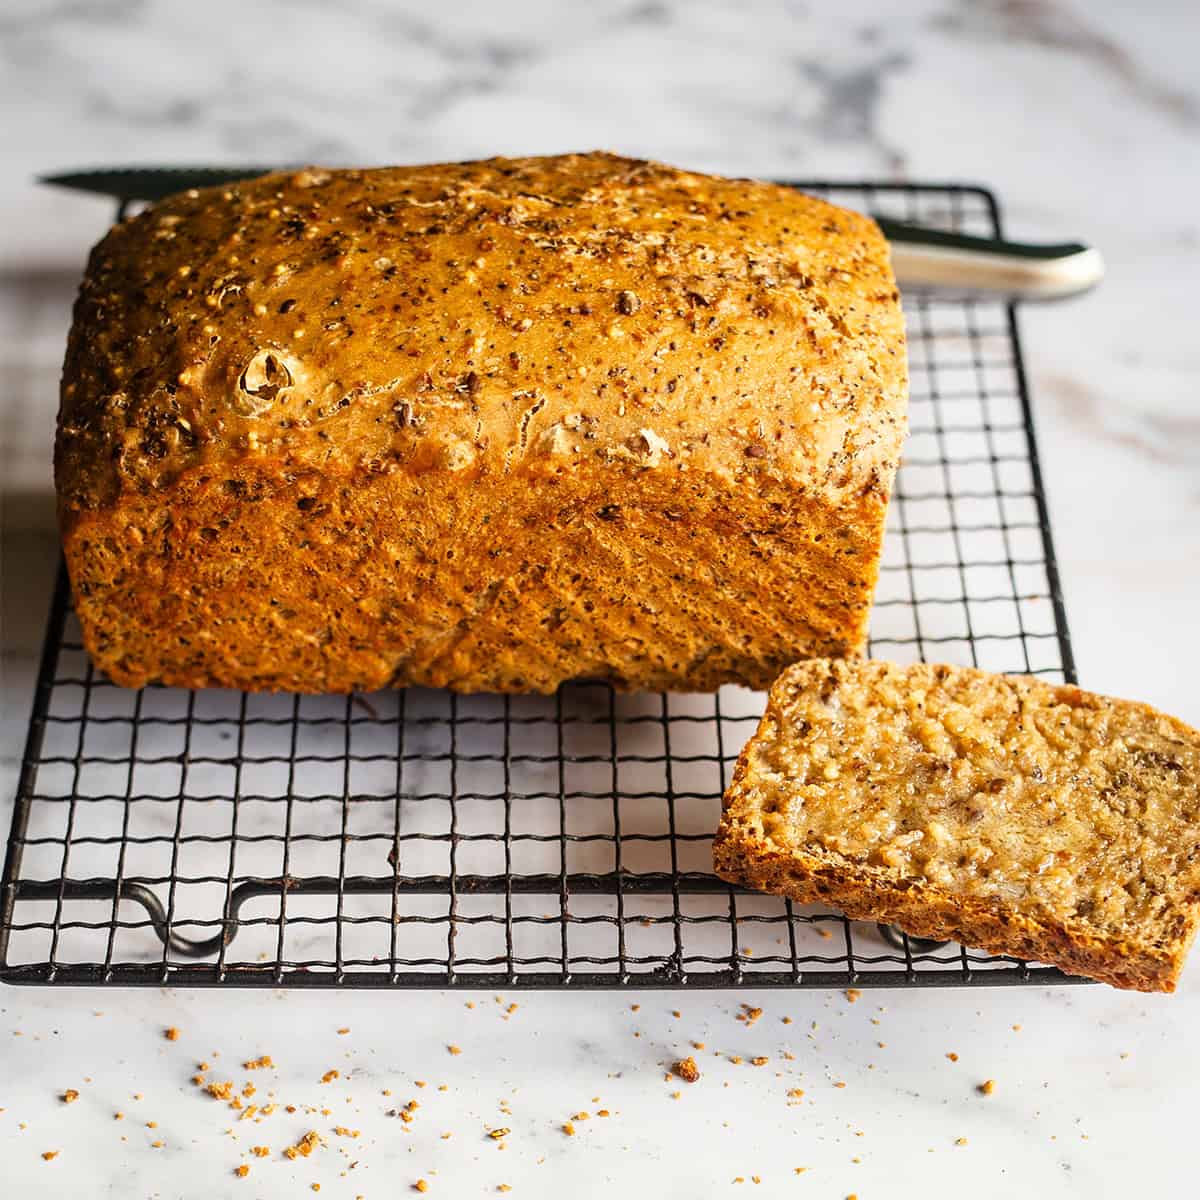
A note on baking: This recipe was developed for a very hot oven and a covered pot. The temperature and baking time may need adjusting for a loaf tin, so check that the centre is fully baked before removing it from the oven. This variation needs testing with your particular tin before specific timings can be recommended.
If you want a consistently shaped sandwich loaf, a recipe developed specifically for a loaf tin will give you a more predictable result.
Gluten-Free No-Knead Bread
Gluten-free bread requires a different balance of flour, liquid and structure. Simply swapping the flour in this recipe for gluten-free flour isn't a reliable substitution.
Use a no-knead recipe specifically developed and tested with a gluten-free flour blend.
What to Serve with No-Knead Bread
This loaf is useful alongside meals that benefit from something to mop up the sauce or broth. It's also lovely toasted the following morning.
Orzo and Mushroom Soup - Serve thick slices alongside this creamy soup.
Chicken and sweetcorn soup - A simple combination for lunch or a light dinner.
- Garlic Butter: Warm the bread slightly and serve with garlic butter.
- Olive Oil and Za'atar: Tear the loaf into pieces and serve with olive oil and za'atar for dipping.
- Eggs and Toast: Thick slices make excellent toast for breakfast, especially when the loaf is a day old.
How to Store No-Knead Bread
At Room Temperature
Allow the loaf to cool completely before storing it in a bread bag or bread bin. It's best enjoyed on the day it's made, when the crust is at its crispest.
Any leftovers can be stored in a sealed bag at room temperature for up to 3 days. The crust will soften over time, but the bread will still be useful for toast.
Avoid sealing warm bread in a bag, as trapped moisture can make the crust damp.
Can You Freeze No-Knead Bread?
Yes. Once the loaf has cooled completely, slice it and freeze the slices in a freezer-safe bag or container. You can then take out individual slices as needed.
For the best quality, use frozen bread within around 3 months.
How Do You Reheat No-Knead Bread?
Toast individual slices straight from frozen.
To refresh a larger piece, place it in a hot oven for a few minutes until warmed through and the crust has crisped up. Keep an eye on it so it doesn't dry out.
Frequently Asked Questions
Is no-knead bread really easy to make?
Yes. The hands-on work is minimal: mix the ingredients, allow the dough to rise, shape it gently and bake it. The long fermentation does much of the work that kneading would normally help with.
Why does no-knead bread need such a long rise?
The dough needs time to ferment and develop its structure. The extended rise also helps develop flavour. The exact time depends on your kitchen temperature and the activity of your yeast.
Can I leave no-knead bread to rise for 24 hours?
It can be possible, particularly in a cool kitchen, but the timing depends on the room temperature and amount of yeast used. If the dough ferments for too long, it may become overproofed, collapse or develop an overly strong fermented flavour.
Follow the dough's appearance as well as the clock.
Can I put no-knead bread dough in the fridge overnight?
Refrigeration isn't necessary for this recipe, which is designed around a room-temperature rise. Refrigeration slows fermentation and changes the timing. If you want to use a cold fermentation, allow extra time for the dough to warm up and finish rising before baking.
Can I make no-knead bread without a Dutch oven?
Yes, provided you have another heavy oven-safe pot with a suitable lid that can withstand the baking temperature. The lid is important because it traps steam. Without a covered vessel, the crust and rise may be different.
Can I bake no-knead bread in a loaf tin?
Yes. A loaf tin can help contain the wet dough and give the bread a more traditional shape. However, the crust and crumb will differ from bread baked in a covered Dutch oven. Because this recipe was developed for a covered pot, you may need to adjust the baking method and temperature. For a reliable sandwich loaf, use a recipe specifically developed for a loaf tin.
Why is my no-knead bread dense?
A dense loaf can result from dough that hasn't risen sufficiently, inactive yeast, too much additional flour or fermentation that has gone too far.
Make sure the dough becomes bubbly and aerated before shaping, and allow it to complete the second rise.
Why is my no-knead bread gummy inside?
The loaf may need more baking time, or it may have been cut before it cooled. Check that the centre is fully baked and allow the bread to cool on a wire rack for at least an hour before slicing.
Can I use plain flour instead of bread flour?
Yes. Plain flour works well in this recipe, although the bread may have a slightly less chewy texture and a different crumb. Strong white bread flour is my preference.
Can I use wholemeal flour?
Yes, but wholemeal flour will generally produce a denser loaf and may need more water. Start by replacing part of the white flour rather than all of it.
Is no-knead bread vegan?
The four ingredients in this recipe are plant-based, so the loaf is suitable for a vegan diet when made with the ingredients listed.
How do I know when the bread is ready?
The crust should be a deep golden brown and feel firm. Tapping the base may produce a hollow sound, and the centre of the loaf should generally reach around 95-99°C when fully baked.
More Bread Recipes to Try
If you enjoy making bread at home, keep an eye out for more homemade bread recipes on Tiffin & Tea, including:
Chicken Stuffed Buns - Chicken Bread Rolls
Did you make this recipe?
Rate and Leave a comment
Did you make this recipe? i'd love to hear about it! did you try any variations? if you loved this recipe/tried any variations/have some top tips, please leave a star rating and comment below. Your reviews make our day and your tips help others to find our recipes and enjoy them too!
you can also follow us on instagram and subscribe to our newsletter to get our latest recipes.
📖 Recipe

Easy No-Knead Bread (4 Ingredients)
Ingredients
- 3 cups Strong Bread Flour or Plain Flour
- ½ teaspoon Dry Yeast
- 1 teaspoon Salt
- 1 ⅓ Room Temperature Water
Instructions
Step 1: Mix the Dough
- Add the flour, instant yeast and salt to a large mixing bowl. Stir to combine.
- Pour in the lukewarm water and mix with a wooden spoon or your hand until all the flour has been incorporated. This should only take around 30 seconds.
- The dough will look rough, shaggy and sticky rather than smooth. It may cling to the spoon or your fingers, and that's completely normal.
- Don't add extra flour just because the dough feels sticky. A wetter dough helps produce the open crumb that makes this bread so lovely.
Step 2: Leave the Dough to Rise Overnight
- Cover the bowl with a plate, cling film or a clean tea towel.
- Leave the dough at room temperature, away from direct sunlight, for at least 12 hours and preferably around 18 hours.
- A room temperature of approximately 22°C is a useful guide. If your kitchen is cooler, fermentation will happen more slowly and the dough may need longer.
- The dough is ready when its surface is dotted with bubbles and it looks visibly aerated. You may also notice that it has expanded considerably and has a slightly fermented aroma.
- This long, slow rise develops the flavour and structure of the bread. Resist the temptation to rush it.
Step 3: Shape the Dough
- Generously flour your work surface. Use a bowl scraper or rubber spatula to ease the dough out of the bowl in one piece.
- It will be loose, sticky and may stretch into long strands as you lift it. This is what you want, so avoid adding more flour to make it feel like a conventional bread dough.
- Lightly flour your hands and gently lift the edges of the dough towards the centre, folding them over one another. Continue around the dough until you have formed a rough, round shape.
- Tuck the edges underneath to make a loose ball.
- Work quickly and gently. You don't need to knead the dough or make it perfectly smooth.
Step 4: Prepare for the Second Rise
- Generously dust a clean, smooth cotton tea towel with flour, cornmeal or wheat bran. Avoid using a fluffy terry-cloth towel, as the dough can stick to it.
- Place the dough on the towel with the seam facing down. Dust the top lightly with more flour, cornmeal or bran, then cover with another clean tea towel or cling film.
- Leave it to rise for approximately 2 hours.
- During this time, the dough should expand and become noticeably puffier.
- How do you know when it's ready? Gently press the dough with a floured fingertip. If the indentation remains and the dough feels airy, it's likely ready to bake. If it springs back immediately, give it another 15 minutes and check again.
Step 5: Preheat the Oven and Pot
- About 30 minutes before the second rise is complete, preheat your oven to 230°C conventional / 210°C fan / Gas Mark 8.
- Place the oven rack in the lower third of the oven. Put your empty Dutch oven and its lid inside to heat thoroughly.
- The hot pot helps the dough begin baking immediately and creates the steamy environment needed for a crisp crust.
- Take care when handling the pot. It will be extremely hot, so use thick oven gloves and keep it on a stable, heatproof surface.
Step 6: Transfer the Dough to the Hot Pot
- Once the dough has completed its second rise, carefully remove the hot pot from the oven and take off the lid.
- Uncover the dough and gently lift it into the pot, turning it over so the seam faces upwards.
- Take care not to touch the hot sides of the pot. The dough may look a little untidy when it lands, but don't worry about that. It will expand as it bakes.
- If you prefer, you can use a piece of baking paper to help transfer the dough, provided the paper is suitable for the oven temperature. Avoid leaving excess paper close to heating elements.
Step 7: Bake with the Lid On
- Cover the pot and return it to the oven.
- Bake for 30 minutes with the lid on. The covered pot traps steam released by the dough, allowing the loaf to expand before the crust sets.
Step 8: Remove the Lid and Finish Baking
- Carefully remove the lid, keeping your hands and face away from escaping steam.
- Continue baking uncovered for another 15-30 minutes, until the bread has developed a deep golden-brown crust.
- The exact time will depend on your oven and how dark you like your crust. Keep an eye on the loaf towards the end of baking.
Step 9: Cool Before Slicing
- Use oven gloves or a suitable heatproof spatula to remove the bread from the pot. Transfer it to a wire rack.
- Leave the loaf to cool for at least an hour before slicing.
- I know it's tempting to cut into freshly baked bread straight away, but the inside continues to set as it cools. Slicing too early can leave the crumb gummy, even when the loaf is fully baked.
- Once cooled, slice and serve.
Notes
Tips for Making the Best No-Knead Bread
Don't Rush the First Rise
The long fermentation is central to this recipe. It develops the flavour and gives the dough time to become airy. Look for bubbles across the surface rather than relying on the clock alone.Remember That Sticky Dough Is Normal
This isn't a dough you need to knead until smooth. It should be loose and sticky after mixing and may cling to the bowl when you turn it out. Use a scraper and lightly floured hands rather than adding lots of extra flour.Be Gentle When Shaping
You only need to fold the edges towards the centre and tuck them underneath. Overworking the dough isn't necessary and can knock out some of the air that has developed during fermentation.Give the Dough Its Second Rise
The second rise allows the shaped dough to become puffy before baking. If the dough springs back immediately when lightly pressed, leave it for another 15 minutes and check again.Preheat the Pot Properly
A thoroughly heated pot helps the loaf expand when it first goes into the oven. The lid traps steam, which helps create a crisp crust.Check Your Yeast
Yeast that is old or poorly stored may not work effectively. If the dough hasn't developed bubbles after a reasonable amount of time, check the yeast and consider whether your kitchen is particularly cold.Know When the Bread Is Done
The crust should be a deep golden brown and feel firm. You can also tap the base of the loaf; it should sound hollow, although this isn't a foolproof test. For a more reliable check, the centre of a fully baked lean loaf will generally reach around 95–99°C.Let the Bread Cool Completely
Allow at least an hour for cooling before slicing. This gives the crumb time to set, making the bread easier to cut and improving its texture.Recipe Testing Notes
- The dough is wetter than usual bread dough. This is intentional and helps create an open crumb. Resist adding more flour during mixing.
- The first rise depends on temperature. A cool kitchen slows fermentation, while a warmer kitchen speeds it up. Look for bubbles and an aerated appearance.
- The second rise matters. After shaping, give the dough approximately 2 hours to become puffy, checking its readiness rather than relying entirely on the clock.
- The covered pot creates steam. This is an important part of the original method and helps the crust develop.
- Baking time varies. Allow 15-30 minutes uncovered, depending on your oven and preferred crust colour.
- The crumb needs time to set. Cool the loaf on a wire rack before slicing.
Variations
Wholemeal No-Knead Bread
You can experiment with wholemeal flour, but the loaf will usually be denser than one made with white bread flour. Wholemeal flour absorbs water differently, so the dough may need more moisture. For a more predictable result, start by replacing part of the white flour with wholemeal flour rather than substituting all of it at once.No-Knead Bread with Plain Flour
Plain flour works in this recipe if you don't have strong white bread flour. The finished loaf may have a slightly less chewy texture, but it is still a useful option.Seeded No-Knead Bread
Try adding a small handful of sunflower, pumpkin or sesame seeds to the dough. Seeds absorb moisture, so large quantities may change the consistency. You can also scatter seeds over the surface before baking, although they may not adhere well without a little water.Herb and Garlic Bread
Add dried herbs to the flour before mixing for a savoury variation. Alternatively, serve the finished loaf with garlic butter or alongside a garlicky soup. Fresh garlic and other wet additions can affect moisture and fermentation, so keep the first experiment simple.Can You Make No-Knead Bread in a Loaf Tin?
Yes, you can try baking no-knead bread in a loaf tin, although the shape and crust will be different from a round loaf baked in a Dutch oven. The dough is quite wet, so it may not hold the neat shape you'd expect from a traditional sandwich loaf. A loaf tin helps contain the dough, but the finished bread will depend on the size of the tin and the consistency of the dough. To try it, grease your loaf tin and line it with baking paper. After the dough has completed its first rise, gently shape it and transfer it to the tin. Allow it to rise until it looks puffy before baking. An ordinary loaf tin won't trap steam in the same way as a covered cast-iron pot, so the crust may be less crisp. The bread may still be delicious for sandwiches and toast, but the crumb and crust can differ from the original recipe. A note on baking: This recipe was developed for a very hot oven and a covered pot. The temperature and baking time may need adjusting for a loaf tin, so check that the centre is fully baked before removing it from the oven. This variation needs testing with your particular tin before specific timings can be recommended. If you want a consistently shaped sandwich loaf, a recipe developed specifically for a loaf tin will give you a more predictable result.Gluten-Free No-Knead Bread
Gluten-free bread requires a different balance of flour, liquid and structure. Simply swapping the flour in this recipe for gluten-free flour isn't a reliable substitution. Use a no-knead recipe specifically developed and tested with a gluten-free flour blend.What to Serve with No-Knead Bread
This loaf is useful alongside meals that benefit from something to mop up the sauce or broth. It's also lovely toasted the following morning. Orzo and Mushroom Soup - Serve thick slices alongside this creamy soup. Chicken and sweetcorn soup - A simple combination for lunch or a light dinner.- Garlic Butter: Warm the bread slightly and serve with garlic butter.
- Olive Oil and Za'atar: Tear the loaf into pieces and serve with olive oil and za'atar for dipping.
- Eggs and Toast: Thick slices make excellent toast for breakfast, especially when the loaf is a day old.



Jocelyn Raymond says
What is the amount of water in the recipe? It says 1 1/2 at room temperature. Is that 1 cup? 1 & 1/2 cups or 1/2 cup? Thank you
Safira says
Hi Jocelyn,
It is 1 & 1/2. Will update for clarity. x
Michelle says
Now! This is my kind of bread! Easy to make and it tastes delicious. It turned out perfect, thank you for sharing this!
Safira says
I'm so glad! Thank you
Jacqueline Meldrum says
I don't often make a dish right away, but I've been meaning to make a no-knead bread like this for a while. You have inspired me to get on and make it. I am going to make it this afternoon, then leave it overnight to rise. Thanks so much for the recipe and the nudge.
Sharing!
Safira says
Fantastic. I hope you love it! 🙂
Anita says
This is also my favorite bread to bake. In fact, I bought a dutch oven years ago for the sole purpose of baking this no knead bread. 🙂
Safira says
I brought one just for bread baking. Great minds!
Heidy L. McCallum says
This bread was wonderful. It took less time than some of my other recipes but tasted like I took all the time in the world on it. Yum'd to save for later.
Safira says
Thank you. Glad you loved it!
Cate says
Mmmm I've been looking for a simple no-fuss bread recipe, love this one!
Safira says
One of my faves too!