
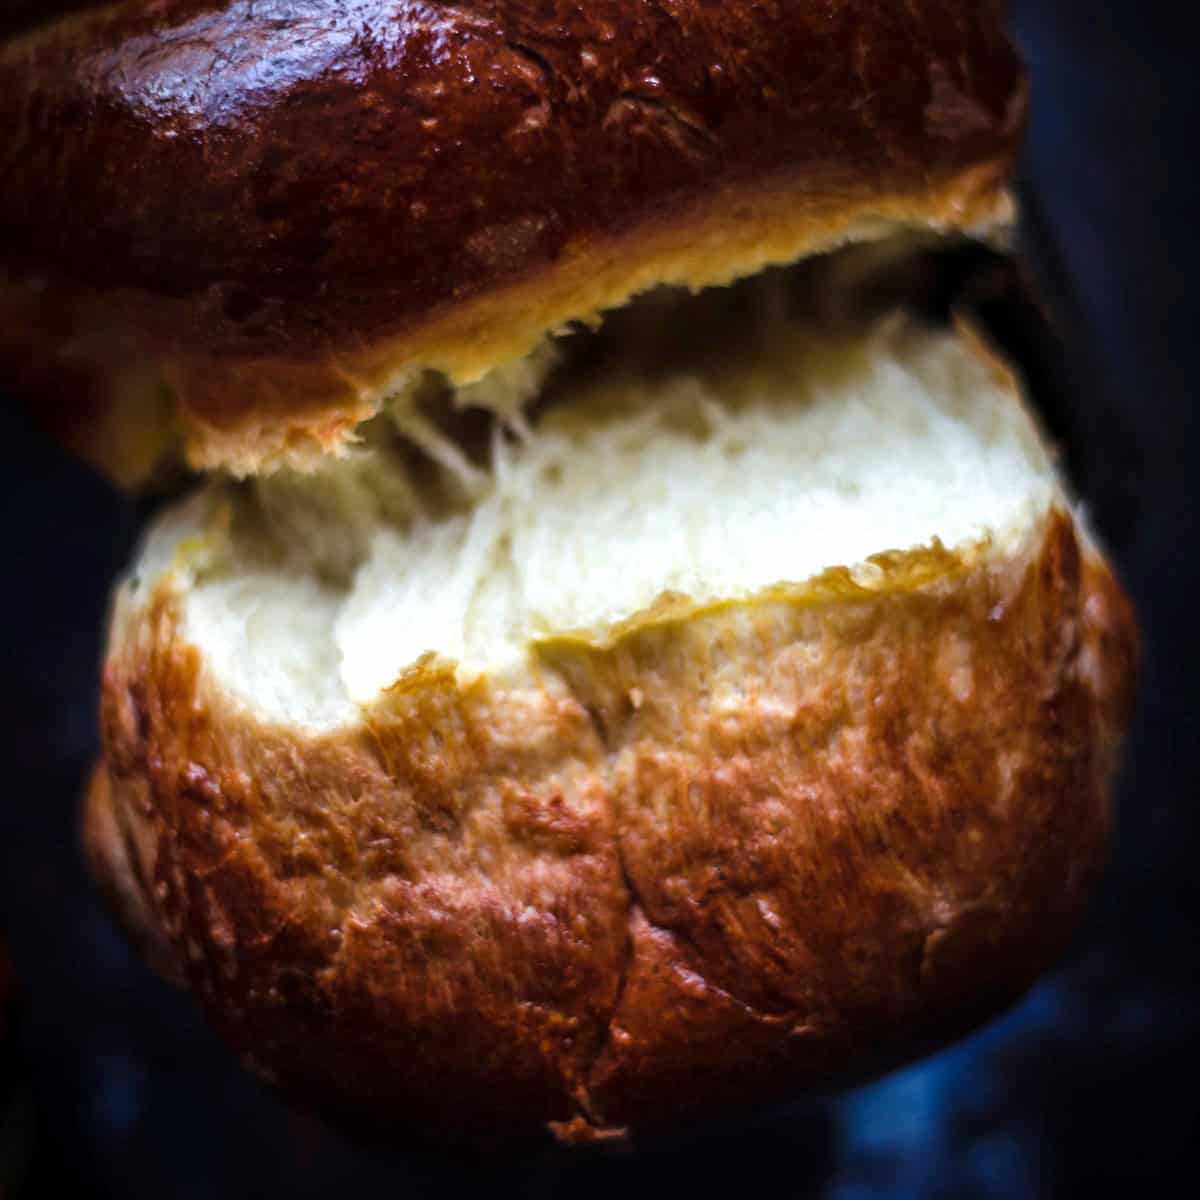
The softest, fluffiest bread with a delicate crumb that practically pulls itself apart into feathery layers. That's Japanese milk bread. Add a little butter while it's still warm and you'll understand why this loaf is so easy to become obsessed with.
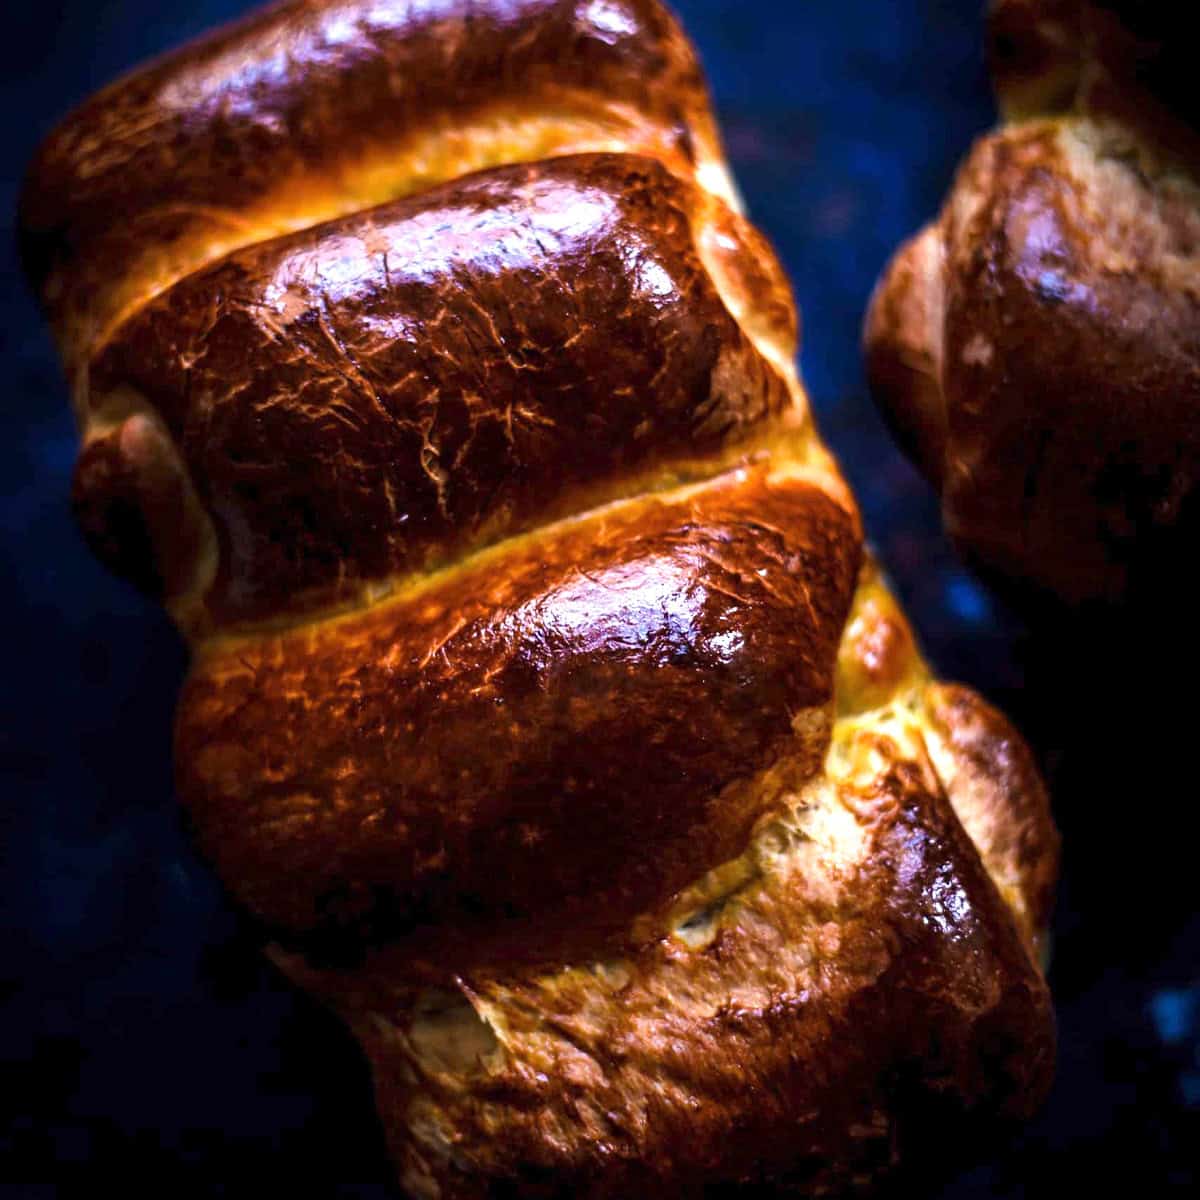
Also known as Hokkaido milk bread, this Japanese-style bread uses a technique called tangzhong to create its famously soft texture. The dough is enriched with milk, cream, eggs, butter and sugar, giving it a gentle sweetness and a tender crumb that stays soft for longer than many homemade loaves.
I've been making this bread in different forms for years, and one of my favourite things about it is the dough itself. Once properly kneaded, it becomes smooth, stretchy and beautifully elastic. It's lovely to shape, rises into a generous loaf and bakes into bread that works just as well for sandwiches as it does torn into pieces and eaten straight from the loaf.
The secret isn't complicated, but a couple of details make all the difference. The tangzhong needs to thicken properly, the dough needs enough kneading to develop its gluten, and the loaves need time to prove before baking.
This recipe makes two loaves, so you can enjoy one fresh and freeze the other. Although, depending on how quickly your household gets through bread, you might want to keep both close.
Jump to:
- Recipe snapshot
- Why you'll love this recipe
- What is Japanese milk bread?
- What is tangzhong?
- Ingredients you'll need
- How to make Japanese milk bread
- Tips for the softest Japanese milk bread
- Can I make Japanese milk bread without a stand mixer?
- Can I use active dried yeast instead of instant yeast?
- Can I make Japanese milk bread into rolls?
- Can I add milk powder or condensed milk?
- What can I serve with Japanese milk bread?
- How to store Japanese milk bread
- Frequently asked questions
- 📖 Recipe
Recipe snapshot
- Cuisine: Japanese
- Prep time: 30 minutes
- Total time: 3 hours 30 minutes
- Yield: 2 loaves, approximately 20 servings
- Texture: Soft, fluffy, tender and buttery
- Key technique: Tangzhong
- Best for: Sandwiches, toast, breakfast and homemade bread rolls
Why you'll love this recipe
- An incredibly soft crumb. Tangzhong helps the dough retain moisture, giving the finished bread its characteristic pillowy texture.
- A beautiful dough to work with. With enough kneading, it becomes smooth and elastic, making it easier to shape.
- Useful for more than sandwiches. Make toast, lunchbox sandwiches or soft bread rolls using the same dough.
- A loaf that stays tender. The tangzhong technique helps the bread retain moisture, so it stays soft for longer.
- Two loaves in one bake. Keep one for now and freeze the other for another day.
What is Japanese milk bread?
Japanese milk bread is known for its fine crumb, soft texture and slightly sweet flavour. It's often associated with Hokkaido milk bread, a name that references Hokkaido, Japan's northernmost main island, which is well known for its dairy produce.
You may also see the name Shokupan, which refers to Japanese everyday bread, commonly baked in a loaf tin and sliced for toast and sandwiches.
The dough is enriched with milk, eggs, butter and sugar. Strong bread flour gives it the structure it needs to rise, while the tangzhong technique helps create the exceptionally tender crumb.
Although there are different ways to make Japanese milk bread, the principle is the same: develop a strong dough, give it enough time to rise and handle it carefully so that it bakes into a soft, well-structured loaf.
What is tangzhong?
Tangzhong is a technique in which a small amount of flour is whisked with liquid and cooked into a thick paste before being added to the main dough.
As the mixture heats, the starch in the flour gelatinises and absorbs liquid. This allows the dough to retain more moisture without becoming unnecessarily difficult to handle. It also helps the baked bread stay soft for longer.
The technique became widely known internationally through Taiwanese baking author Yvonne Chen's book 65°C Bread Doctor, published in 2007.
The temperature in the title refers to the temperature associated with starch gelatinisation in this method. You don't need a thermometer for this recipe, though. The tangzhong should thicken into a smooth paste, with a consistency similar to thick wallpaper paste.
Keep whisking as it cooks to prevent lumps from forming. Once thickened, transfer it to a bowl and let it cool before adding it to the dough.
Don't add hot tangzhong to the dough. It needs to cool first so that it doesn't interfere with the yeast.
You might also come across yudane, a related Japanese technique. The two methods are similar in purpose but differ in preparation: tangzhong is cooked in a saucepan, while yudane is made by pouring hot liquid over flour.
For this recipe, we're using tangzhong.
Ingredients you'll need
The exact quantities are listed in the recipe card below. Here's what each ingredient does and what to look out for.
For the tangzhong
Strong bread flour: Provides the starch needed to thicken the paste.
Water: Helps hydrate the flour and contributes to the moisture-retaining properties of the tangzhong.
Milk: Adds flavour and richness while helping create a tender crumb.
For the dough
Strong bread flour: The foundation of the dough. Its protein helps develop gluten, which gives the bread its elasticity and allows it to trap air as it rises. Use strong white bread flour for the best results.
Eggs: Enrich the dough and contribute to its structure and tenderness.
Instant dried yeast or active dried yeast: Produces the rise that gives the bread its light texture. Check that your yeast is within its use-by date.
Double cream: Adds richness and helps create a tender crumb.
Milk: Contributes moisture, flavour and softness.
Caster sugar: Adds a gentle sweetness and helps the crust develop colour.
Butter: Gives the bread its buttery flavour and soft texture. Use room-temperature butter cut into cubes so that it incorporates more easily.
Salt: Balances the sweetness and enhances flavour. It also plays an important role in dough development.
For the egg wash
Egg yolk: Brushed over the loaves before baking, it gives the crust a glossy, golden finish. A small splash of milk can be added if you prefer a slightly thinner wash.
How to make Japanese milk bread
1. Make the tangzhong
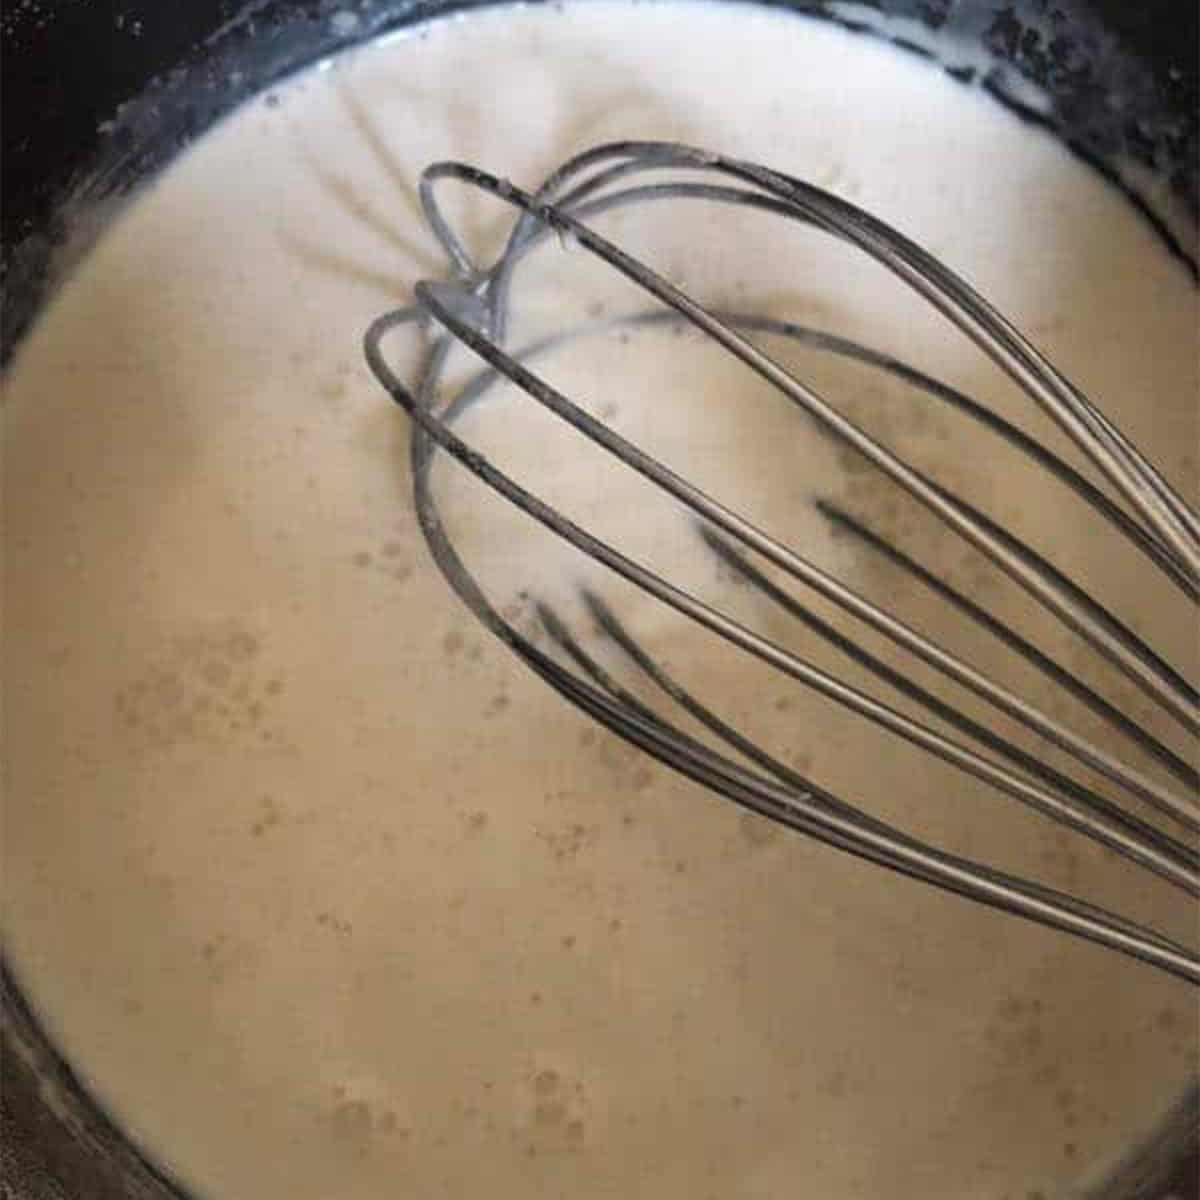
Whisk the flour, milk and water together in a small saucepan until smooth. Place over medium-low heat and cook, whisking constantly, until the mixture thickens into a paste.
It should be smooth and thick enough to leave trails when you drag the whisk through it. The mixture will continue to thicken as it heats, so keep stirring and remove it from the heat once it reaches the right consistency.
Transfer it to a bowl and leave it to cool completely before using.
You can make the tangzhong ahead of time. Cover it to prevent a skin forming and refrigerate if needed, then allow it to lose its chill before adding it to the dough.
2. Mix the dough
Add the cooled tangzhong, eggs, yeast, double cream and milk to the bowl of a stand mixer. Mix on low speed for a couple of minutes.
Add the strong bread flour, sugar and salt, then continue mixing until a dough begins to form and develop elasticity.
At this stage, the dough may look rough. That's fine. You're looking for the ingredients to come together and begin forming a stretchy dough before the butter is added.
3. Knead in the butter
Add the room-temperature butter a few cubes at a time, allowing each addition to incorporate before adding more.
The dough may become slippery and look as though it's coming apart when you first add the butter. Keep kneading rather than adding more flour. As the butter incorporates and the gluten continues to develop, the dough should become smoother and more elastic.
This stage is important. Gluten forms a network that traps the air produced by the yeast. If the dough hasn't developed enough strength, it won't hold as much air and the finished bread may be denser.
You're looking for a dough that is smooth, stretchy and supple rather than rough or easily torn.
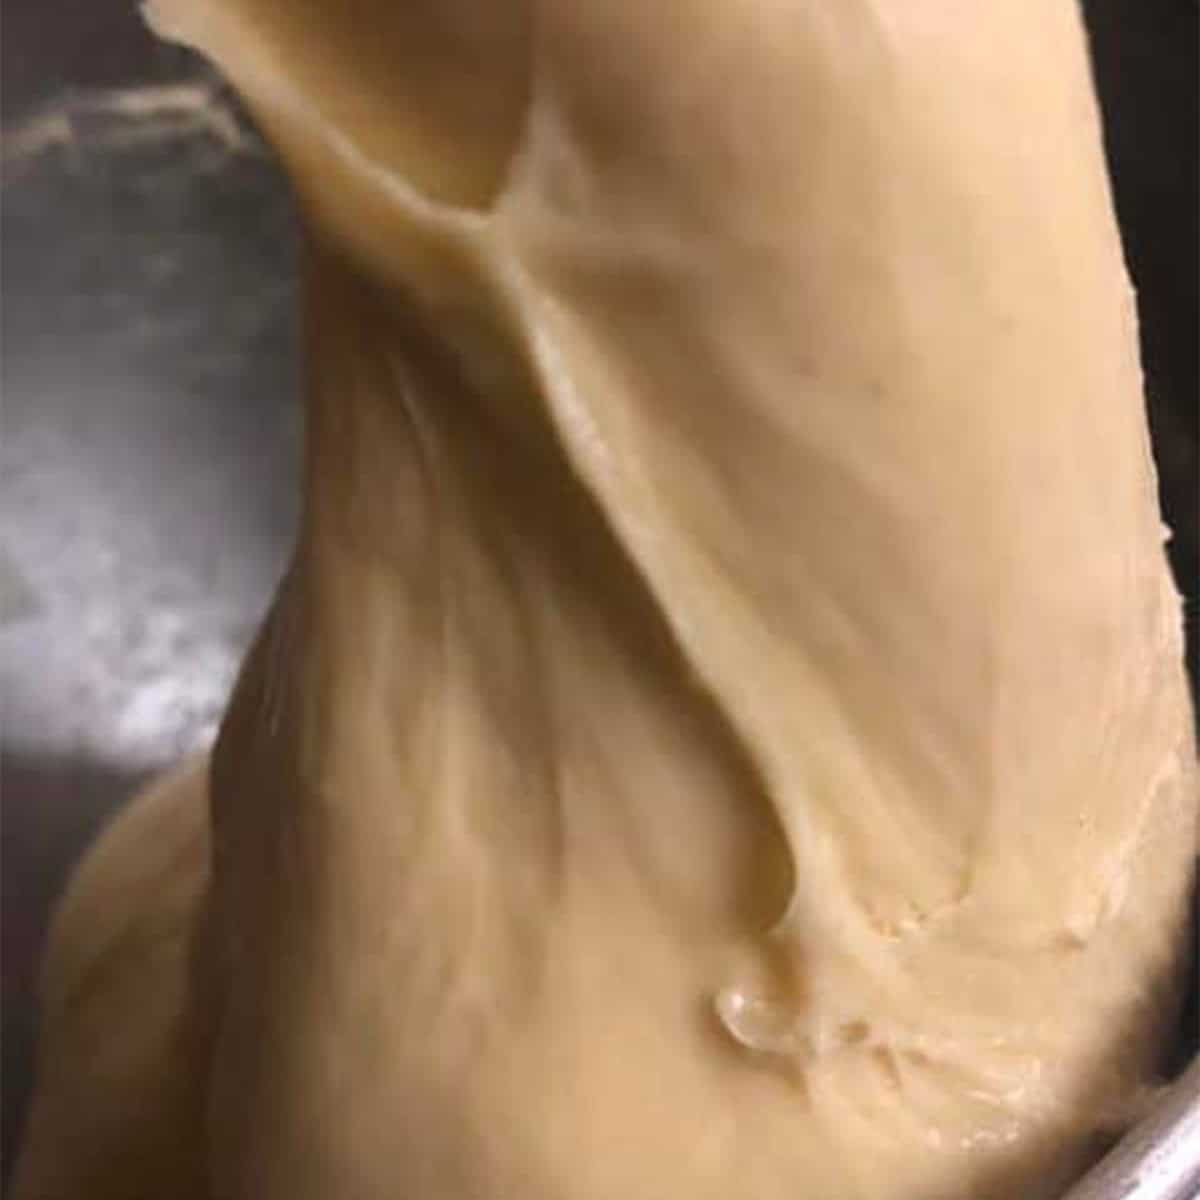
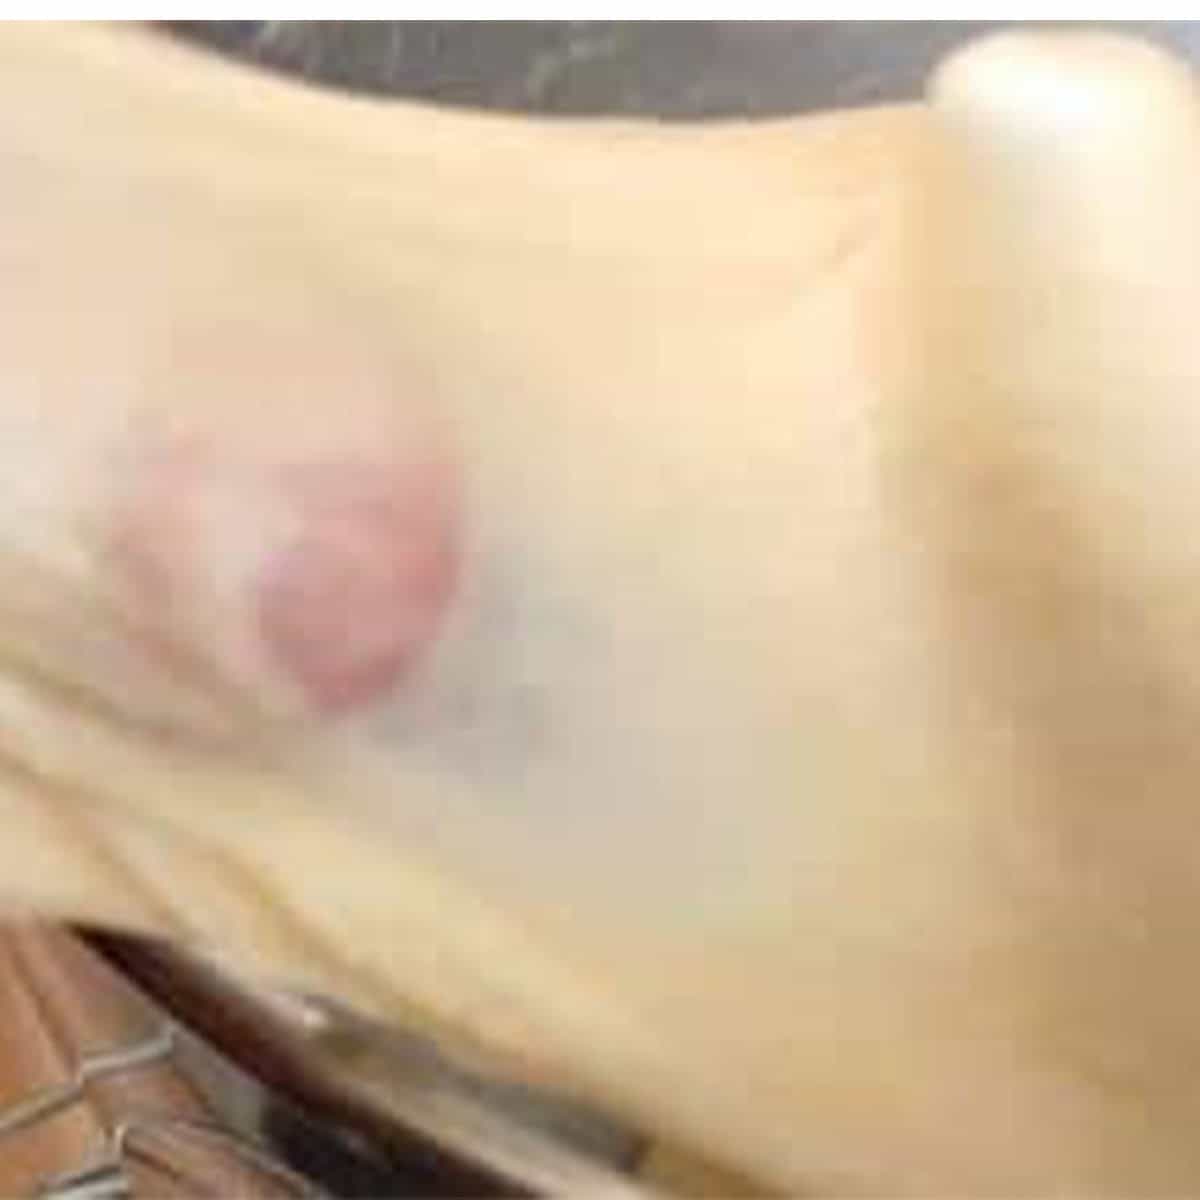
A useful check is the windowpane test. Pinch off a small piece of dough and gently stretch it between your fingers. If it stretches into a thin membrane that you can almost see through before tearing, the gluten is well developed. If it tears quickly, continue kneading and test again.
4. Prove the dough
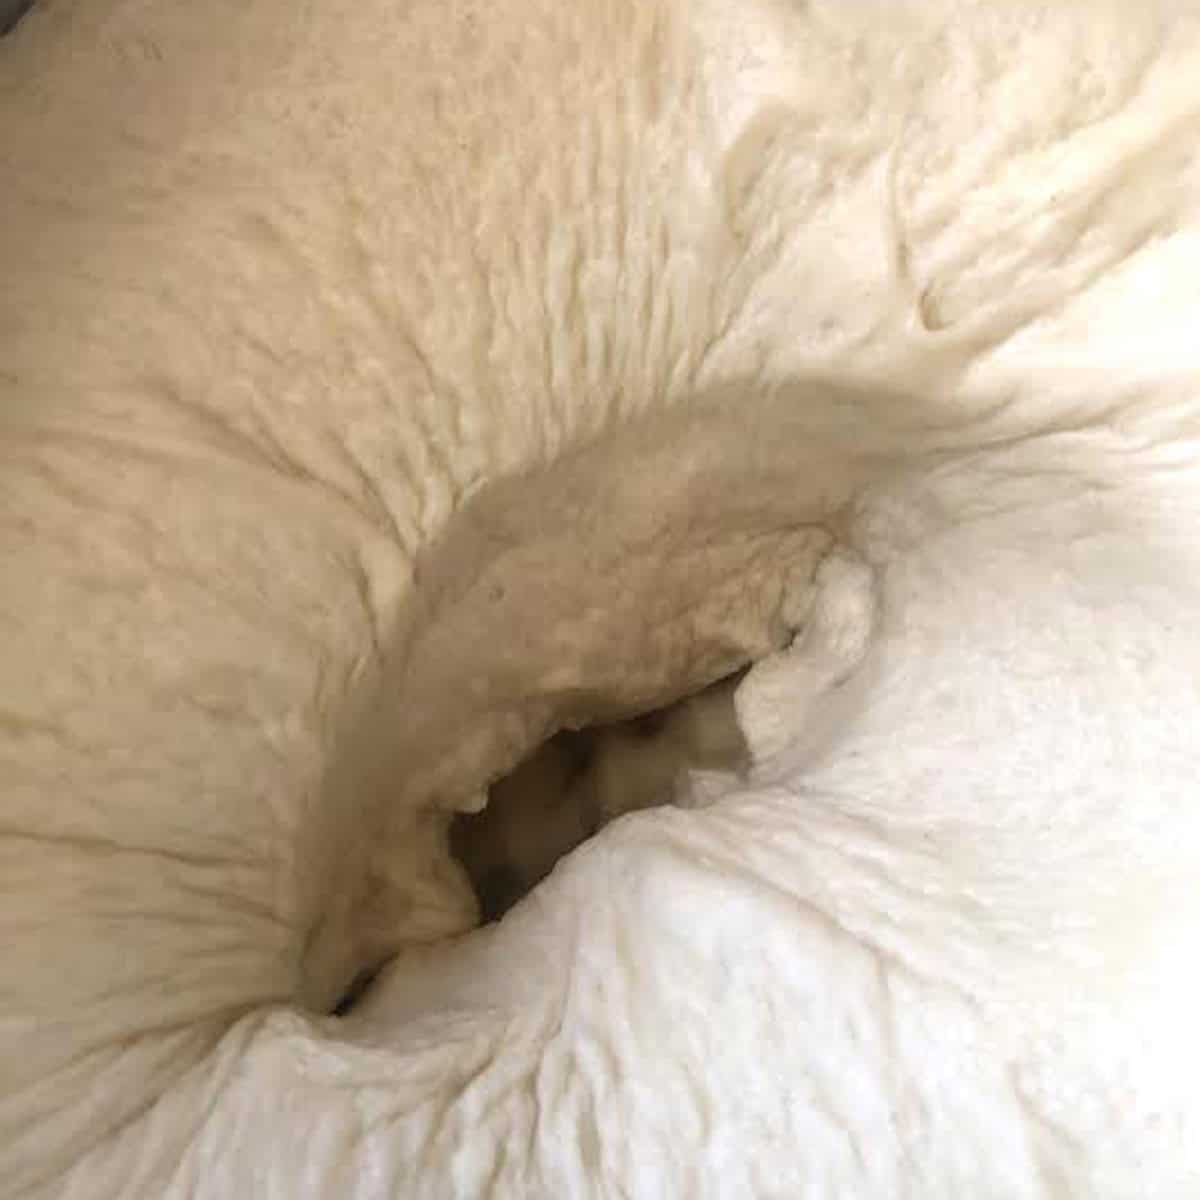
Transfer the dough to a lightly greased bowl, cover and leave it in a warm place until it has doubled in size.
The first rise will usually take around an hour, but your kitchen temperature and the activity of your yeast will affect the timing.
Once risen, gently deflate the dough and bring the edges towards the centre. Return it to the bowl, cover and allow it to rest for the additional time specified in the recipe.
5. Shape the loaves
Lightly flour your work surface and grease two loaf tins.
Divide the dough in half, then divide each half into three or four equal portions, following the shaping method in the recipe card.
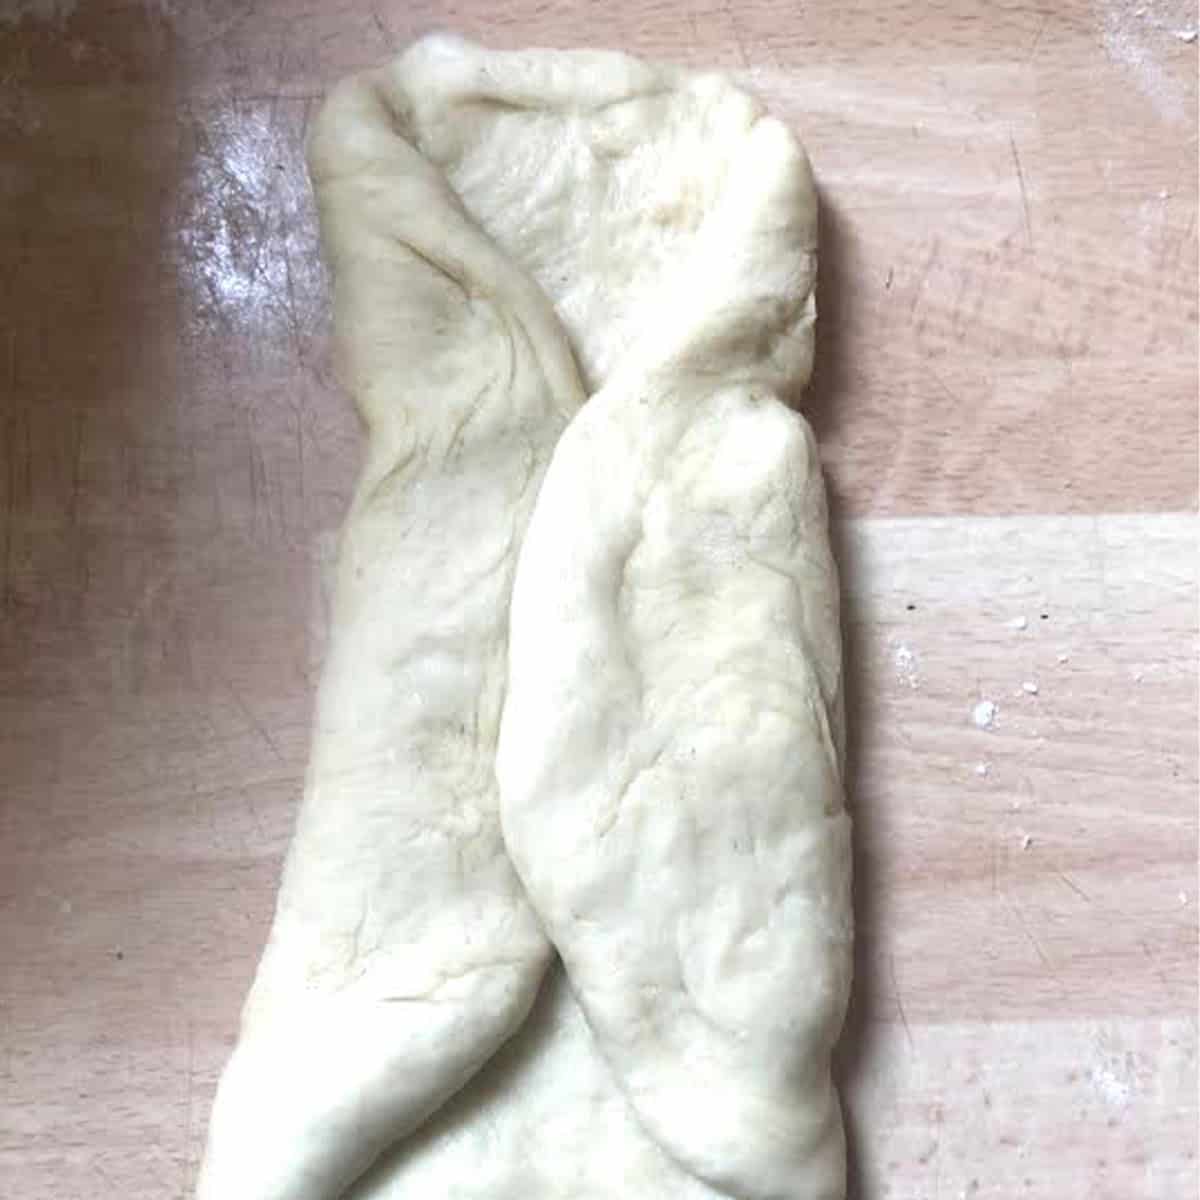
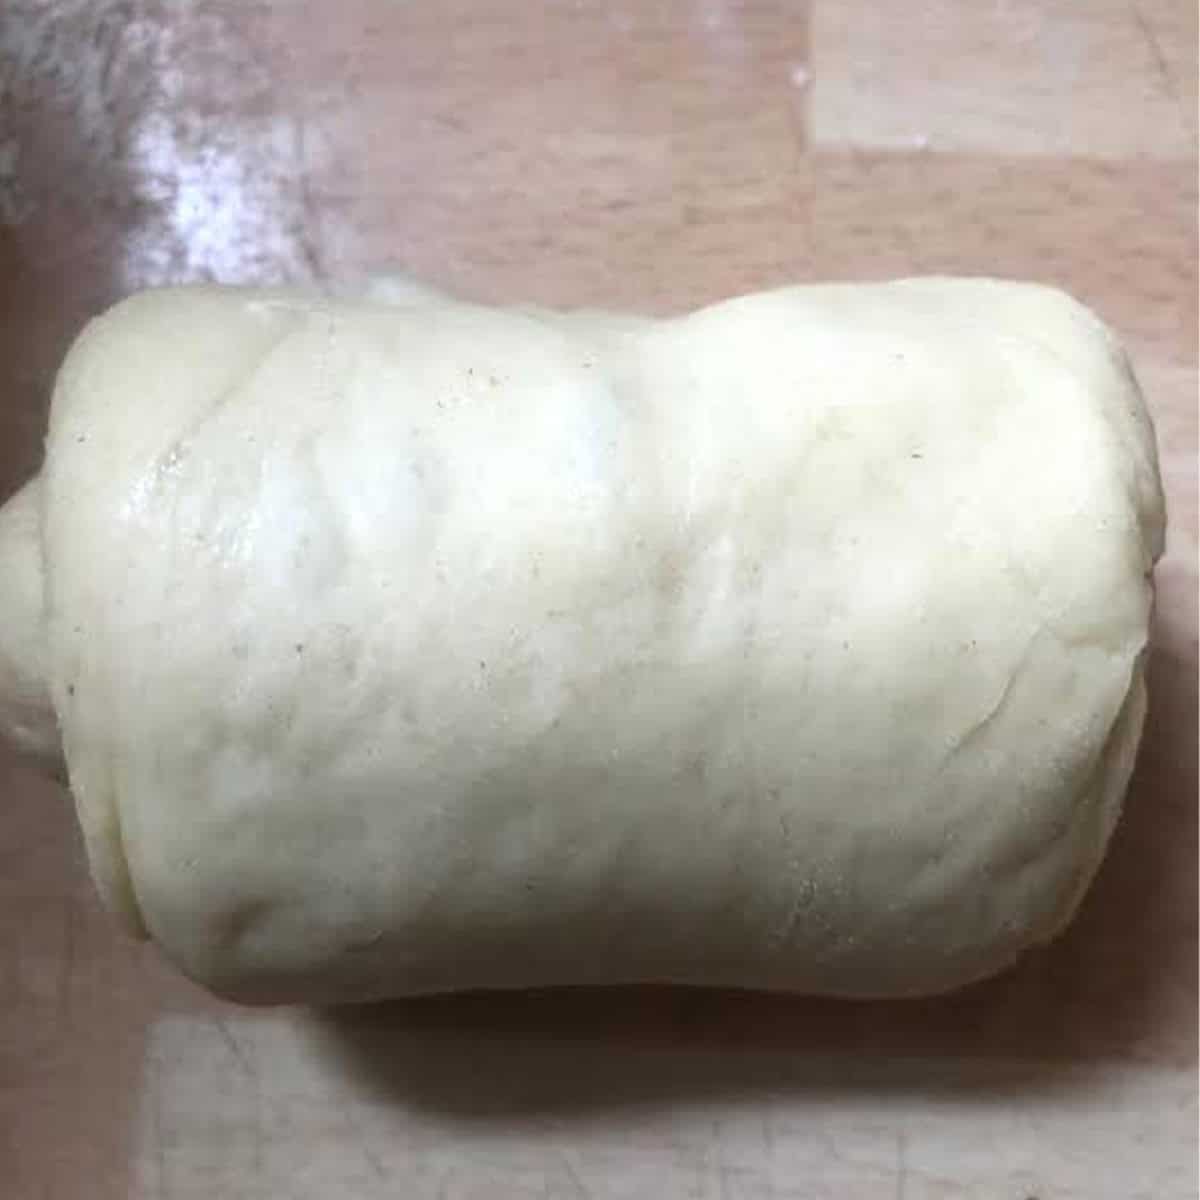
Working with one piece at a time, roll it into an oval. Fold one side towards the centre, then fold the opposite side over it. Roll the folded dough up and place it seam-side down in the prepared tin.
Repeat with the remaining pieces, arranging them evenly in the tins.
This folding and rolling isn't just about appearance. It adds structure to the dough, helping the loaf hold its shape as it rises and bakes.
Try to keep the portions similar in size so that they rise and bake evenly. Kitchen scales are useful if you want to be precise.
6. Prove again
Cover the tins and leave the shaped dough to rise until the pieces look visibly puffy and have expanded.
The second rise is just as important as the first. If the dough hasn't risen enough, the bread can be dense. If it's left to over-prove, the dough may lose strength and collapse during baking or as it cools.
Use the appearance of the dough as your guide rather than relying entirely on the clock.
7. Bake
Preheat the oven to 180°C / Gas Mark 4.
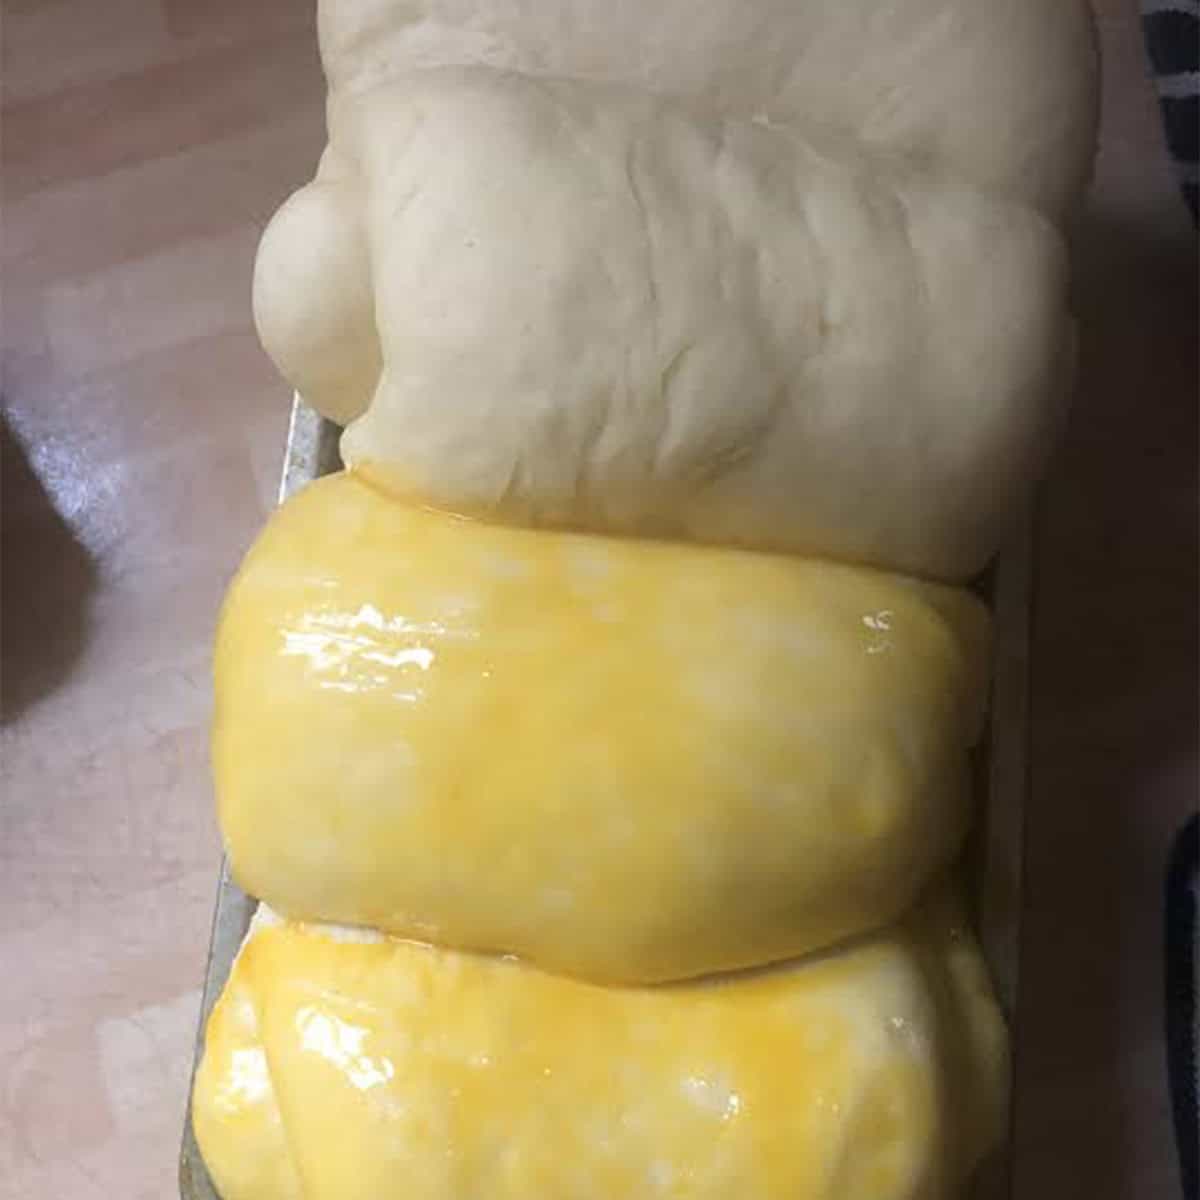
Brush the tops gently with the egg yolk wash and bake according to the recipe card, until the loaves are golden and cooked through.
Let the bread rest in the tins for around 15 minutes before turning it out onto a wire rack.
Allow the loaves to cool before slicing. The crumb is still setting as the bread cools, so cutting too early can compress that lovely soft texture.
If you're tempted to tear off a warm piece, I completely understand. Just give the loaf a little time first.
Tips for the softest Japanese milk bread
Use strong bread flour
Strong bread flour helps develop the gluten needed for a good rise and a soft, structured crumb. Different flours absorb liquid differently, so avoid switching to plain flour unless you're prepared for a change in texture.
Get the tangzhong consistency right
The tangzhong should be a thick, smooth paste rather than a runny sauce. Keep whisking as it cooks and let it cool before using.
Don't rush the kneading
The dough needs to develop enough gluten to hold the air created during proving. It should become smooth, stretchy and elastic. If it tears easily during the windowpane test, it needs more kneading.
Add the butter gradually
Adding the butter a little at a time helps it incorporate evenly. Wait for each addition to be mostly absorbed before adding more.
Resist adding extra flour
This is a soft, enriched dough, so it may feel sticky at first. Adding too much flour can change the hydration and make the bread heavier. Give the dough time to develop instead.
Watch the dough, not just the clock
Proving times vary according to room temperature and yeast activity. Look for the dough to double during the first rise and become visibly puffy after shaping.
Grease your loaf tins properly
Grease the base and sides before adding the dough. This makes it easier to release the loaves after baking.
Cool before slicing
Allowing the bread to cool helps the crumb set, making it easier to cut neat slices without squashing the loaf.
Can I make Japanese milk bread without a stand mixer?
Yes. A stand mixer makes this dough easier to knead, particularly after the butter has been added, but you can knead it by hand.
Work patiently and use a dough scraper to help gather the dough from your work surface. It may feel sticky initially, but avoid adding lots of extra flour. Continue kneading until it becomes smoother and more elastic.
Can I use active dried yeast instead of instant yeast?
Yes. Modern active dried yeast can often be used in the same quantity as instant yeast, although the dough may take longer to rise.
Follow the instructions on your packet, as products vary. Some recommend dissolving the yeast in liquid before use, while others can be added directly to the flour.
If your yeast needs activating, use a little of the milk already measured for the recipe. Don't add extra liquid, and make sure it isn't too hot.
Can I make Japanese milk bread into rolls?
Absolutely. Shape the dough into individual rolls instead of placing it in loaf tins. Arrange them on a lined baking tray with space between each roll to allow for expansion.
Cover and prove until puffy, then brush with egg wash and bake. Rolls will cook faster than full loaves, so start checking them earlier. The original recipe suggests around 20-25 minutes, depending on their size and your oven.
Can I add milk powder or condensed milk?
Both are possible additions to enriched bread dough, but they aren't necessary for this recipe.
Milk powder can contribute to a softer, richer crumb. If you experiment with it, account for the additional dry ingredient rather than simply adding it without considering the flour balance.
Sweetened condensed milk can also add sweetness and richness, but it changes the sugar and liquid balance. I'd make the original recipe first before experimenting with either addition.
What can I serve with Japanese milk bread?
This bread is lovely with salted butter, jam or honey, but its uses go well beyond breakfast.
Try it for egg sandwiches, chicken sandwiches or lunchbox fillings. It also makes excellent toast, with lightly golden edges and a soft centre.
The gentle sweetness works with both sweet and savoury toppings, making it a useful loaf to have around.
How to store Japanese milk bread
At room temperature: Allow the bread to cool completely, then store it in a sealed bread bag or airtight container. It should keep for around 2-4 days, although the texture is best on the day it's baked.
In the freezer: Wrap the cooled loaf well and freeze for up to three weeks, as suggested in the original recipe notes. You can freeze it whole or slice it first for convenience.
To serve: Defrost at room temperature or toast slices straight from frozen.
Avoid refrigerating the bread if possible, as this can make it stale more quickly.
Frequently asked questions
Is Japanese milk bread the same as Hokkaido milk bread?
The names are closely related and are often used interchangeably for this soft, enriched style of bread. Hokkaido milk bread refers to a style associated with Japan's Hokkaido region, while Japanese milk bread is the broader descriptive term.
Why is my Japanese milk bread dense?
Common reasons include under-kneading, insufficient proving, inactive yeast or adding too much extra flour. Make sure the dough becomes elastic, allow it to rise sufficiently and check that the yeast is still active.
Why is my milk bread dough sticky?
The dough contains milk, eggs, cream and butter, so it is naturally soft and may feel sticky at first. Continue kneading until it develops strength rather than adding extra flour too quickly.
Why did my bread collapse after baking?
Over-proving can weaken the dough, while underbaking can leave too much moisture in the centre. Make sure the dough has risen sufficiently without over-expanding, and bake the loaf until cooked through.
Can I prepare tangzhong in advance?
Yes. Make it ahead, cover it and refrigerate it if needed. Allow it to lose its chill before mixing it into the dough, and never add it while hot.
Can I freeze Japanese milk bread?
Yes. Once completely cool, wrap the loaf well and freeze it whole or sliced. Slices can be toasted straight from frozen.
More bread recipes:
Khachapuri (Georgian Cheese Bread)
Yemeni Honeycomb Bread (Khaliat Nahal)
Adapted from a combination of recipes - Joanne Chang, Bon Appetite and King Arthur Flour.
Rate and Leave a comment
Did you make this recipe? i'd love to hear about it! did you try any variations? if you loved this recipe/tried any variations/have some top tips, please leave a star rating and comment below. Your reviews make our day and your tips help others to find our recipes and enjoy them too!
you can also follow us on instagram and subscribe to our newsletter to get our latest recipes.
📖 Recipe

Japanese Milk Bread (Soft, Fluffy and Buttery)
Ingredients
Tangzhoug
- 45 g Strong Bread Flour
- 100 g Water
- 140 g Milk
Dough
- 2 large Eggs
- 14 g Instant Dry Yeast or Active Dry Yeast. See notes
- 100 g Double Cream
- 140 g Milk
- 710 g Strong Bread Flour
- 100 g Caster Sugar
- 115 g Butter In cubes, at room temperature
- 2 teaspoon Salt
Egg Wash
- 1 Egg Yolk Whisked. You can add a splash of milk to this if you like.
Instructions
Make the tangzhong
- Whisk the flour, milk and water together in a small saucepan until smooth. Place over medium-low heat and cook, whisking constantly, until the mixture thickens into a paste.
- It should be smooth and thick enough to leave trails when you drag the whisk through it. The mixture will continue to thicken as it heats, so keep stirring and remove it from the heat once it reaches the right consistency.
- Transfer it to a bowl and leave it to cool completely before using.
- You can make the tangzhong ahead of time. Cover it to prevent a skin forming and refrigerate if needed, then allow it to lose its chill before adding it to the dough.
Mix the dough
- Add the cooled tangzhong, eggs, yeast, double cream and milk to the bowl of a stand mixer. Mix on low speed for a couple of minutes.
- Add the strong bread flour, sugar and salt, then continue mixing until a dough begins to form and develop elasticity.
- At this stage, the dough may look rough. That's fine. You're looking for the ingredients to come together and begin forming a stretchy dough before the butter is added.
Knead in the butter
- Add the room-temperature butter a few cubes at a time, allowing each addition to incorporate before adding more.
- The dough may become slippery and look as though it's coming apart when you first add the butter. Keep kneading rather than adding more flour. As the butter incorporates and the gluten continues to develop, the dough should become smoother and more elastic.
- This stage is important. Gluten forms a network that traps the air produced by the yeast. If the dough hasn't developed enough strength, it won't hold as much air and the finished bread may be denser.
- You're looking for a dough that is smooth, stretchy and supple rather than rough or easily torn.
- A useful check is the windowpane test. Pinch off a small piece of dough and gently stretch it between your fingers. If it stretches into a thin membrane that you can almost see through before tearing, the gluten is well developed. If it tears quickly, continue kneading and test again.
Prove the dough
- Transfer the dough to a lightly greased bowl, cover and leave it in a warm place until it has doubled in size.
- The first rise will usually take around an hour, but your kitchen temperature and the activity of your yeast will affect the timing.
- Once risen, gently deflate the dough and bring the edges towards the centre. Return it to the bowl, cover and allow it to rest for the additional time specified in the recipe.
Shape the loaves
- Lightly flour your work surface and grease two loaf tins.
- Divide the dough in half, then divide each half into three or four equal portions, following the shaping method in the recipe card.
- Working with one piece at a time, roll it into an oval. Fold one side towards the centre, then fold the opposite side over it. Roll the folded dough up and place it seam-side down in the prepared tin.
- Repeat with the remaining pieces, arranging them evenly in the tins.
- This folding and rolling isn't just about appearance. It adds structure to the dough, helping the loaf hold its shape as it rises and bakes.
- Try to keep the portions similar in size so that they rise and bake evenly. Kitchen scales are useful if you want to be precise.
Prove again
- Cover the tins and leave the shaped dough to rise until the pieces look visibly puffy and have expanded.
- The second rise is just as important as the first. If the dough hasn't risen enough, the bread can be dense. If it's left to over-prove, the dough may lose strength and collapse during baking or as it cools.
- Use the appearance of the dough as your guide rather than relying entirely on the clock.
Bake
- Preheat the oven to 180°C / Gas Mark 4.
- Brush the tops gently with the egg yolk wash and bake according to the recipe card, until the loaves are golden and cooked through.
- Let the bread rest in the tins for around 15 minutes before turning it out onto a wire rack.
- Allow the loaves to cool before slicing. The crumb is still setting as the bread cools, so cutting too early can compress that lovely soft texture.
- If you're tempted to tear off a warm piece, I completely understand. Just give the loaf a little time first.


Aisha says
Hi! I just discovered the Tangzhoug method a few days ago and then this recipe popped up! I’m so excited to try.
Can I switch up the double cream for sour cream? I have some that needs using up.
Thanks!
Safira says
Hi Aisha,
It should work because hydration love will remain the same but the taste will be slightly different. Hope you enjoy it.
I have some bun versions coming soon. x