The BEST Homemade Burger Buns - The softest, lightest, fluffiest burger buns ever! A million times better then store brought burger buns and so easy to make! Now that it's officially BBQ season, I thought this would be the perfect time to share the recipe for the BEST homemade burger buns.

The BEST Homemade Burger Buns
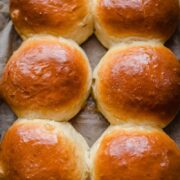
These golden burger buns are squishy, soft and absolutely delicious.
Made using the Tangzhoug method, this is a follow up to the Hokkaido Milk Bread recipe I shared.
I have made several other buns using this method and I have a recipe coming for each of them soon. I have made these Milk Buns as Dinner Rolls, Stuffed with fillings and Sweet Rolls.
Burger Buns with Tangzhong
The Tangzhoug method is a method that was shared by Yvonne Chen in her book - The 65 degree bread doctor.
This method calls for part of the flour to be cooked with water and creating a roux before adding it into the dough.
This method traps hydration which improves the overall texture and flavour of the bread. It also means you get a longer shelf life and a super soft and squishy bread.
This dough is meant to be sticky so avoid adding any extra flour. It will look wet and sticky but it will come together eventually as it is kneaded.
Adding extra will create a dense chewy bun instead of the light fluffy milk/brioche-style bun we want.
If the dough doesn't feel like it's coming together at all, let it rest for about 10 minutes before continuing kneading to relax the gluten.
Ingredients in the Best Homemade Burger Buns
To make the Tangzhoug
Strong Bread Flour and Milk. These are cooked together to create a roux/Tangzhoug.
To make the Dough
Milk - Must be Luke warm for best results.
Yeast (Instant Dry) - More info on this below.
Strong Bread Flour - This has more protein/gluten resulting in a lighter, fluffier dough. I would not recommend replacing with Plain Flour in this recipe.
Salt - Add on the opposite side to yeast and not directly on top of it as it will 'kill' the yeast.
Caster Sugar - Or granulated sugar. The main role of the sugar is to provide food for the yeast. It also helps speed up rise time during proofing.
Eggs and Egg Yolks - These help the dough rise and create a crumb that helps soak up liquids. The egg yolks ass richness and colour.
Unsalted Butter - Adds richness, flavour, a golden crisp crust and gives a longer shelf life.
For the Egg Wash
Eggs and Milk are whisked together and brushed over the buns for a golden bun!
How to make Homemade Burger Buns
make the tangzhoug
Combine water, milk and flour in a pan to make a roux. Let it cool.
mix the dough and let it rise
Mix your dough with the Tangzhoug and remaining ingredients minus the butter, using a stand mixer.
It will be very sticky. Add the butter slowly and knead for 10 - 12 minutes until the dough is pulling away from the sides of the bowl and making a slapping sound.
Shape the dough into a bowl and place in a greased bowl.
Place a damp kitchen towel directly over the bowl and allow it to rest until it has doubled in size. Around 1.5 - 2 hours.
shape into buns
Punch the dough down, and place on a lightly floured work surface.
Cut into portions. I make 6 - 12 buns from this recipe. (Weighing them helps - Mine were around 108g each for 6 buns).
To shape, gently flatten each piece of dough like a pancake.
Pull up each side pinching it together in the centre. Repeat until the ball is sealed. Then cup your hand over the ball and gently move in circular motions until smooth. Place seam side down on a lined tray.
second prove
The dough will need to rise again at room temperature. This time for around 45 mins to 1 hour. Keep an eye on them as this can differ depending on the amount of buns you are making.
Brush with Egg Wash
You can add sesame seeds if you like.
bake
Preheat your oven to GM 5, 190 C at least 20 minutes before baking.
Bake for about 16-18 minutes or until golden brown. Transfer to a wire rack to cool completely.


TIPS AND FAQS
Here are some tips and tricks that will help with this recipe:
active dry yeast vs instant yeast
Instant yeast and active dry yeast are interchangeable at a 1:1 ratio.
However, active dry yeast needs to be bloomed with liquid before continuing with the recipe and may take longer to rise.
What I do when using active dry yeast is add the yeast to part of the milk (milk should be warm) from the recipe and let it stand for a bit before continuing with the recipe.
In this recipe if using Active Dry Yeast, I bloom the yeast in all the milk rather then part.
can the dough be kneaded by hand?
It is far easier to knead this with a stand mixer with a dough hook attachment. The dough is quite sticky and takes some kneading to come together.
If you prefer to knead by hand, you will need to knead a lot longer.
can these burger buns be made ahead of time?
To make the dough ahead of time, allow the first rise of the dough to happen in the fridge overnight. Let it come to room temperature before knocking the air out of it and shaping into buns.
can burger buns be frozen?
Yes! Bake the buns as indicated then allow to cool completely. Place in an airtight container in the freezer for up to 1 month.
Allow to defrost at room temperature before reheating in a 180°C/Gas Mark 4 until warmed through.
How to know when burger bun dough is ready to bake
The dough will double in size. It shouldn't get larger then that.
Do the poke test - Poke the dough. It shouldn't bounce back quickly because this would mean it is under proved. If it bounces back slowly to mid way and leaves a small indent, it is ready to go into the oven.
Storage for Homemade Burger Buns
These burger buns keep well in an airtight container at room temperature for up to 5 days.
What is the window pane test?
Once you can stretch the dough with your fingers without it tearing, it is ready. Enough gluten has developed in the dough for it to begin proofing.
This is called the windowpane test. If the dough tears, it means you need to knead a little more.

Can these be made ahead of time?
To make the dough ahead of time, allow the first rise of the dough to happen in the fridge overnight. Let it come to room temperature before knocking the air out of it and shaping into buns.
Can they be frozen?
Yes! Bake the buns as indicated then allow to cool completely. Place in an airtight container in the freezer for up to 1 month.
Allow to defrost at room temperature before reheating in a 180°C/Gas Mark 4 until warmed through.
More Bread Recipes:
Try with:
Love this recipe? Please rate it 5 stars ⭐️⭐️⭐️⭐️⭐️ below in the recipe card. And, if you make it, please tag me on social media! I would love to see your creations and they may be shared in our newsletter (with your permission!).

📖 Recipe
The BEST Homemade Burger Buns
Ingredients
Tangzhoug
- 2 tablespoon Strong Bread Flour
- 7 tablespoon Milk
Dough
- 120 g Milk Luke warm
- 9 g Yeast I use Instant Dry (See Notes)
- 350 g Strong Bread Flour
- 7 g Salt
- 35 g Caster Sugar
- 1 Egg At room temperature
- 1 Egg Yolk At room temperature
- 45 g Unsalted Butter (Or 3 tbsp), Softened
Egg Wash
- 1 Egg
- Splash Milk
Instructions
Tangzhoug
- Combine the ingredients for the Tangzhoug in a pan over medium high heat. It will begin to thicken quickly and create a paste. After 2 minutes, remove the pan from the heat and allow to cool.
Dough
- Add the yeast to the warm milk and allow to sit for 6 minutes.
- Add the remaining ingredients apart from the butter, along with the tangzhoug to the bowl of a stand mixer. Mix for 2 minutes.
- Add the butter slowly and knead for 10 - 12 minutes until the dough is pulling away from the sides of the bowl and making a slapping sound and the dough looks smooth.
- Place a damp kitchen towel directly over the bowl and allow it to rest until it has doubled in size. Around 1.5 - 2 hours.
- Shape the buns. Punch the dough down, and place on a lightly floured work surface. Cut into 6 - 12 portions. (Weighing them helps - Mine were around 108g each for 6 large buns).
- To shape, gently flatten each piece of dough like a pancake.Pull up each side pinching it together in the center. Repeat until the ball is sealed. Then cup your hand over the ball and gently move in circular motions keeping contact with the surface, until smooth. Place seam side down on a lined tray.
- The dough will need to rise again. This time for around 1 - 1.5 hours.
- Whisk milk and egg to gather and brush buns with Egg Wash (You can add sesame seeds if you like).
- Preheat your oven to GM 5, 190 C for 20 minutes before baking. Bake for about 16-18 minutes or until golden brown. Brush with melted butter.
- Transfer to a wire rack to cool completely.


Katherine says
WOW - fluffy, shiny, soft buns. Totally worth every second to make them.
Safira says
Thanks Kate. Glad you liked them as much as we do. 🙂
Ashley says
These look incredible -- they remind me of the shiny and perfect rolls from Picadilly Cafeteria, back in the day! 😉 I think I'll make a bunch of these and freeze them since it's burger season now!
Safira says
That is such a compliment. Thank you! Hope you love them. 🙂
Kathryn Donangelo says
This recipe was so easy and it went perfectly with my turkey burgers! I will be making again and the steps are so helpful. Gorgeous photos too! 🙂
Safira says
Yay! So glad to hear it. Glad you liked them!
SHANIKA says
Wow! I so need to start making my own burger buns! These look so soft + fluffy! How easy!
Safira says
These are time consuming (mainly hands off though) but really easy! Hope you like them.
Bintu | Recipes From A Pantry says
You just can't beat homemade burger buns - these look so soft and delicious!
Safira says
YESS! Store brought buns don't come close!